Tag Archives: microsoft-365

Domain Authentication, User Settings, and Entra PasswordPolicies

PasswordPolicies in Microsoft EntraID allow administrators to control the application of password expiration or strong password requirements across their M365 tenant. In this article I want to explore PasswordPolicies configurations and how settings interact with authentication types, domains, and individual users.

Background – PasswordPolices Management and Domains

Microsoft Entra ID password expiration is a per domain setting. Each registered and verified root domain can have unique password expiration policies applied to them, while sub-domains will inherit the password policy from its parent. The settings that control password expiration are PasswordNotificationWindowInDays and PasswordValidityPeriodInDays.

Tenant Defaults

In Microsoft 365 the default settings for all domains are that the PasswordNotificationWindowInDays and PasswordValidityPeriodInDays is NULL meaning password expiration is not enabled for tenants created after 2021.

https://learn.microsoft.com/en-us/microsoft-365/admin/manage/set-password-expiration-policy?view=o365-worldwide

As the admin, you can make user passwords expire after a certain number of days, or set passwords to never expire. By default, passwords are set to never expire for your organization.

Using Get-MGDomain the password expiration settings can be verified:

PS C:\> get-mgDomain -DomainId domain.net | select-object PasswordNotificationWindowInDays,PasswordValidityPeriodInDays | fl


PasswordNotificationWindowInDays :
PasswordValidityPeriodInDays     :

This also corresponds to the password expiration settings in the Microsoft 365 Admin Center showing NULL values.

If your tenant was created prior to 2021 your password expiration period by default is 90 days. Tenants created after 2021 have passwords set to never expire by default regardless of the checkbox in the M365 Admin Center password expiration policy user interface.

https://learn.microsoft.com/en-us/entra/identity/authentication/concept-sspr-policy#password-policies-that-only-apply-to-cloud-user-accounts

Default value: No expiration. If the tenant was created before 2021, it has a 90 day expiration value by default. You can check current policy with Get-MgDomain.
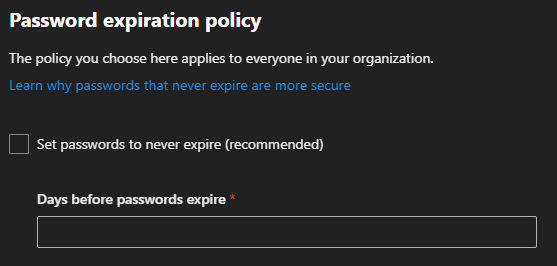
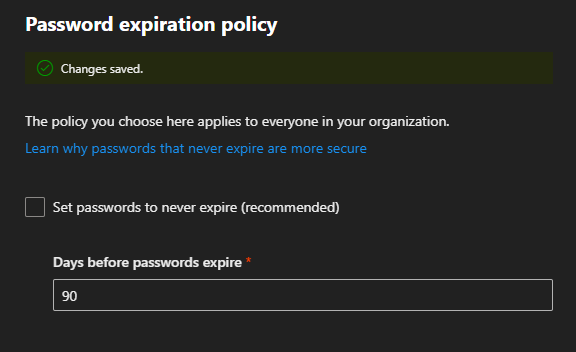
The value is configurable by using the Update-MgDomain cmdlet from the Microsoft Graph module for PowerShell.

Enabling password expiration in the M365 Admin Center

The M365 admin center has a single setting to manage the password expiration policy. This setting does not distinguish between domains and modification of these settings triggers changes across all domains registered in Microsoft 365.

Setting the property “days before passwords expire” adjusts the PasswordValidityPeriodInDays across all eligable domains.

Using Get-MGDomain the password expiration settings can be verified.

Id                               : domain.com
AuthenticationType               : Federated
IsDefault                        : False
PasswordNotificationWindowInDays :
PasswordValidityPeriodInDays     :

Id                               : domain.onmicrosoft.com
AuthenticationType               : Managed
IsDefault                        : True
PasswordNotificationWindowInDays :
PasswordValidityPeriodInDays     :

Id                               : domain.net
AuthenticationType               : Managed
IsDefault                        : False
PasswordNotificationWindowInDays : 30
PasswordValidityPeriodInDays     : 90

Id                               : subdomain.domain.net
AuthenticationType               : Managed
IsDefault                        : False
PasswordNotificationWindowInDays :
PasswordValidityPeriodInDays     :

Id                               : domain2.onmicrosoft.com
AuthenticationType               : Managed
IsDefault                        : False
PasswordNotificationWindowInDays : 30
PasswordValidityPeriodInDays     : 90

Id                               : domain.mail.onmicrosoft.com
AuthenticationType               : Managed
IsDefault                        : False
PasswordNotificationWindowInDays : 30
PasswordValidityPeriodInDays     : 90

Enabling password expiration in the M365 Admin Center – Domain Exceptions

When setting a password expiration window in the M365 Admin Center certain domains are excluded from having their settings automatically set. These include

  • Domains that are Federated for authentication
  • Any domains with the default flag set
  • Any sub domains where the root domain property is set
  • New domains added after the password expiration policy was enabled
  • Domains converted from federated to managed authentication

Federated Domain

Domains that are federated for authentication do not support password expiration in Microsoft 365. All determinants for password expiration are made through the federated authentication process. For example, users federated through Active Directory Federation Services and utilizing Active Directory for authentication would have their passwords expired by on-premises Active Directory and rely on ADFS to handle the password expiration.

Get-MGDomain -domainID domain.com | select-object ID,AuthenticationType,IsDefault,PasswordNotificationWindowInDays,PasswordValidityPeriodInDays

Id                               : domain.com
AuthenticationType               : Federated
IsDefault                        : False
PasswordNotificationWindowInDays :
PasswordValidityPeriodInDays     :

Default Domain

The default domain serves as the domain name utilized on Microsoft 365 objects when no domain is specified or no custom domain is registered.

Get-MGDomain -domainID domain.onmicrosoft.com | select-object ID,AuthenticationType,IsDefault,PasswordNotificationWindowInDays,PasswordValidityPeriodInDays

Id                               : domain.onmicrosoft.com
AuthenticationType               : Managed
IsDefault                        : True
PasswordNotificationWindowInDays :
PasswordValidityPeriodInDays     :

Root Domain

When a subdomain is added to Microsoft 365 where the root domain is already present and registered, a property on the sub-domain is automatically set called root domain. This automatically inherits authentication and password expiration settings that are set on the root domain. If custom authentication or password expiration settings are required for child domains, the root domain property must be cleared.

Get-MGDomain -domainID subdomain.domain.net | select-object ID,AuthenticationType,IsDefault,PasswordNotificationWindowInDays,PasswordValidityPeriodInDays

Id                               : subdomain.domain.net
AuthenticationType               : Managed
IsDefault                        : False
PasswordNotificationWindowInDays :
PasswordValidityPeriodInDays     :

Get-MgDomainRootDomain -DomainId subdomain.domain.net | select-object ID,AuthenticationType,IsDefault,PasswordNotificationWindowInDays,PasswordValidityPeriodInDays | fl

Id                               : domain.net
AuthenticationType               : Managed
IsDefault                        : False
PasswordNotificationWindowInDays : 30
PasswordValidityPeriodInDays     : 90

Domains Added after adjusting settings in the M365 Admin Center

If a domain is added after the expiration period is established in the M365 Admin Center, these domains do not get the PasswordNotificationWindowInDays automatically set.

new-mgDomain -Id newdomain.net

Get-MgDomain -DomainId newdomain.net | select-object ID,AuthenticationType,IsDefault,PasswordNotificationWindowInDays,PasswordValidityPeriodInDays | fl


Id                               : newdomain.net
AuthenticationType               : Managed
IsDefault                        : False
PasswordNotificationWindowInDays :
PasswordValidityPeriodInDays     :

Domains Converted from Federated Authentication to Managed Authentication

In M365 we allow administrators to change the authentication type of a domain from Federated Authentication to Managed Authentication. When setting the password expiration time in the M365 Admin Center any domains that are federated are skipped and the settings are not applied. Additionally, when a domain authentication type is converted from Federated back to Managed, the password expiration settings are not automatically applied.

Get-MGDomain -domainID domain.com | select-object ID,AuthenticationType,IsDefault,PasswordNotificationWindowInDays,PasswordValidityPeriodInDays

Id                               : domain.com
AuthenticationType               : Federated
IsDefault                        : False
PasswordNotificationWindowInDays :
PasswordValidityPeriodInDays     :

Update-MgDomain -DomainId domain.com -AuthenticationType Managed

Get-MgDomain -DomainId domain.com | select-object ID,AuthenticationType,IsDefault,PasswordNotificationWindowInDays,PasswordValidityPeriodInDays | fl


Id                               : domain.com
AuthenticationType               : Managed
IsDefault                        : False
PasswordNotificationWindowInDays :
PasswordValidityPeriodInDays     :

Setting passwords to never expire in the M365 Admin Center

It is Microsoft’s recommendation that customers disable password expiration in Microsoft 365.

https://learn.microsoft.com/en-us/microsoft-365/admin/manage/set-password-expiration-policy?view=o365-worldwide

Current research strongly indicates that mandated password changes do more harm than good. They drive users to choose weaker passwords, reuse passwords, or update old passwords in ways that are easily guessed by hackers. We recommend enabling multi-factor authentication. To learn more about password policy, check out Password policy recommendations.

If a tenant is in the default state, the PasswordValidityPeriodInDays is NULL demonstrating that password expiration is disabled. When selecting the option “Set password to never expire (recommended)” the value 2147483647 is stamped on each domain where password expiration may be enabled. The value 2147483647 is 5883516.8410959 years, effectively disabling any password expiration prompts. (This also happens to be the max value that PasswordValidityPeriodInDays can be set to.)

Get-MgDomain -DomainId domain.net | select-object ID,AuthenticationType,IsDefault,PasswordNotificationWindowInDays,PasswordValidityPeriodInDays | fl


Id                               : domain.net
AuthenticationType               : Managed
IsDefault                        : False
PasswordNotificationWindowInDays : 30
PasswordValidityPeriodInDays     : 2147483647

Setting password expiration using Microsoft Graph

Microsoft Graph provides administrators with the ability to manage password expiration at a more granular level. The command Update-MGDomain allows specifying a custom expiration period on an individual domain.

#Note:  Password notification window in days currently does not do anything but must be specified when running the command.  Users are no longer notified of pending password expiration in Microsoft 365 interfaces.

Update-MgDomain -DomainId domain.net -PasswordValidityPeriodInDays "45" -PasswordNotificationWindowInDays "15"

Microsoft Graph does not allow you to update the settings on domain that is enabled for federated authentication following the same rules as the M365 Admin Center.

Update-MgDomain -DomainId domain.com -PasswordValidityPeriodInDays "45" -PasswordNotificationWindowInDays "15"
Update-MgDomain : Domain operation is not allowed.

Microsoft graph will not allow you to update the password expiration days on a subdomain where root domain is populated.

Update-MgDomain -DomainId subdomain.e-domain.net -PasswordValidityPeriodInDays "45" -PasswordNotificationWindowInDays "15"
Update-MgDomain : Domain operation is not allowed.

Microsoft graph will allow you to set a password expiration days on the default domain even though the M365 Admin Center skips this domain.

Background – Password Policies Management and Users

In the previous section we introduced the settings on domains for password expiration. Every user that is provisioned in Microsoft 365 has a user principal name which incorporates one of the verified domains. The user’s domain settings determine the password policy that is applied to the user in conjunctions with the user’s individual password policy setting.

It may become necessary to manage the password policies of individual users. For example, you may have a service account tied to a domain where password expiration is enabled but you do not want the password to expire on that account. Microsoft Graph provides administrators with the ability to manage a user’s password policy settings through the Update-MGUser command. The ability to run this command on an individual user depends on the domain’s authentication type. Let’s explore how a domain’s authentication type influences the ability to manage a user’s password policies.

CloudPasswordPolicyForPasswordSyncedUsersEnabled

In some installations administrators wish to have the Microsoft 365 password expire at or near the same time as the on-premises Active Directory password expires. By default, the password expiration time is not a value that synchronizes between Active Directory and Microsoft 365.

Directory synchronization provides an optional feature that administrators may enabled named CloudPasswordPolicyForPasswordSyncedUsersEnabled.

https://learn.microsoft.com/en-us/entra/identity/hybrid/connect/how-to-connect-password-hash-synchronization

When the CloudPasswordPolicyForPasswordSyncedUsersEnabled is set to false, any directory synchronized user automatically has their password policies set to DisablePasswordExpiration. We will explore later how this can be modified for individual users based on the domain’s authentication type.

When this feature is enabled, the following changes occur:

New Users

  • All new users synchronized after the feature is enabled will have the PasswordPolicies attribute not set. (NULL = NONE).

Previously Synchronized Users

  • The user changes their password on premises due to password expiration or another password change requirement.
  • Password hash synchronization writes the password hash to Entra ID.
  • The users default value of DisablePasswordExpiration is now re-written to None
    • Note: Enabling this feature does not convert all users to expire passwords, the conversion only occurs as a result of on-premises password change.
  • Microsoft 365 will not evaluate the last password change timestamp and the expiration period and prompt the user for password changes when the passwords have expired.

It is extremely important to note that the password expiration period in Microsoft 365 is always evaluated against the last password change timestamp. There are several operations that could occur at any time that may reset user’s password in EntraID without any password change operation occuring on premises. For example, if a new Entra Connect server is introduced and password hash synchronization is enabled, all password hashes are synchronized effectively changing the expiration date between Active Directory and EntraID.

Default State: Password Policies Attribute

The password polices attribute may have a different default state depending on whether the user is a cloud only user or if the user is directory synchronized. Additionally, if the user is directory synchronized the default password policies state may change depending on the dir sync features enabled.

The password policies attribute has a value of NULL, None, or DisablePasswordExpiration. NULL or NONE are equivalent and will result in the cloud password expiring for managed domains based on the domains settings. The value DisablePasswordExpiration will prevent the users account from expiring the password based on the managed domains settings. If a password policy is set to DisablePasswordExpiration and later the password should expire, setting the password policies to NONE will expire the user’s password.

It may be possible that a user’s password policies attribute differs from the states outlined below. If the domain was managed, password policies were adjusted on users, and then the domain was converted to federated the password policies do not change. If the user was utilizing a federated domain UPN suffix and was then changed to a managed domain suffix the password policies attribute could be edited. This value will not change states as the user’s UPN suffix changes between federated and managed domains or managed domains to federated domains.

Cloud Only User / Managed Domain

PS C:\> get-mgUser -UserId CloudOnlyManaged@domain.net -Property PasswordPolicies | select -ExpandProperty PasswordPolicies
PS C:\>

Directory Synchronized User / CloudPasswordPolicyForPasswordSyncedUsersEnabled FALSE / Federated Domain

get-mgUser -UserId FederatedUser1@domain.com -Property PasswordPolicies | select -ExpandProperty PasswordPolicies
DisablePasswordExpiration

Directory Synchronized User / CloudPasswordPolicyForPasswordSyncedUsersEnabled FALSE / Managed Domain

get-mgUser -UserId ManagedUser1@e-mcmichael.net -Property PasswordPolicies | select -ExpandProperty PasswordPolicies
DisablePasswordExpiration

Directory Synchronized User / CloudPasswordPolicyForPasswordSyncedUsersEnabled TRUE / Federated Domain (Post Password Change)

get-mgUser -UserId FederatedUser1@domain.com -Property PasswordPolicies | select -ExpandProperty PasswordPolicies
None

Directory Synchronized User / CloudPasswordPolicyForPasswordSynchronizedUsersEnabled TRUE / Managed Domain (Post Password Change)

get-mgUser -UserId ManagedUser1@domain.net -Property PasswordPolicies | select -ExpandProperty PasswordPolicies
None

Directory Synchronized NEW User / CloudPasswordPolicyForPasswordSynchronizedUsersEnabled TRUE / Managed Domain

get-mgUser -UserId ManagedUser3@e-mcmichael.net -Property PasswordPolicies | select -ExpandProperty PasswordPolicies
PS C:\>

Directory Synchronized NEW User / CloudPasswordPolicyForPasswordSynchronizedUsersEnabled TRUE / Federated Domain

get-mgUser -UserId FederatedUser3@e-mcmichael.com -Property PasswordPolicies | select -ExpandProperty PasswordPolicies
PS C:\>

Setting PasswordPolicies and Federated Domain Authentication (CloudPasswordPolicyForPasswordSyncedUsersEnabled FALSE)

When a user is created with a domain that utilizes federated authentication the ability to manage the PasswordPolicies attribute is limited.

When using Update-MGUser to set the PasswordPolicies attribute to NONE an error is encountered:

Update-MgUser -UserId FederatedUser1@domain.com -PasswordPolicies None
Update-MgUser : Unable to update the specified properties for on-premises mastered Directory Sync objects or objects
currently undergoing migration.

We note that update-MGUser is not supported on federated domains in the following article.

https://learn.microsoft.com/en-us/entra/identity/hybrid/connect/how-to-connect-password-hash-synchronization

 Note

The Update-MgUser PowerShell command doesn't work on federated domains.

The error returned though is misleading. Based on the error provided one would believe that the passwordPolicies attributes is locked because the object is enabled for directory synchronization. This is not correct the actual error is because the user is set with a domain that is enabled for federated authentication. At the time of publishing our internal engineering groups are reviewing this error and working to make it more accurately reflect the underlying reason.

When using Update-MGUser to set the PasswordPolicies attribute to DisablePasswordExpiration the command completes successfully although in this example it is setting a value that already exists therefore performing no actions on the user object. (See Why did certain scenarios for the federated users work if the commands if update-MGUser does not work on federated domains? below for further explanation.)

Update-MgUser -UserId FederatedUser1@domain.com -PasswordPolicies DisablePasswordExpiration

Setting Password Policies, Federated Domain Authentication, with Managed Authentication Staged Rollout (CloudPasswordPolicyForPasswordSyncedUsersEnabled FALSE)

EntraID allows administrators to test managed authentication without fully converting a federated domain. This feature is known as Managed Authentication Staged Rollout. For more information on managed authentication staged rollout please review: https://learn.microsoft.com/en-us/entra/identity/hybrid/connect/how-to-connect-staged-rollout

When a user is enabled for staged rollout certain password expiration policies apply to the user. Attempting to use Update-MGUser to set the password policies to NONE fails for the same reason as a Federated user.

Update-MgUser -UserId FederatedUser2@domain.com -PasswordPolicies None
Update-MgUser : Unable to update the specified properties for on-premises mastered Directory Sync objects or objects
currently undergoing migration.

Setting Password Policies and Managed Domain Authentication (CloudPasswordPolicyForPasswordSyncedUsersEnabled FALSE)

When a user is created with a domain that utilizes managed authentication the password policies attribute can be fully managed. Here are some examples:

Cloud Only User / Managed Authentication

get-mgUser -UserId CloudOnlyManaged@domain.net -Property PasswordPolicies | select -ExpandProperty PasswordPolicies

#Null Return#

update-mgUser -UserId CloudOnlyManaged@domain.net -PasswordPolicies "DisablePasswordExpiration"

get-mgUser -UserId CloudOnlyManaged@domain.net -Property PasswordPolicies | select -ExpandProperty PasswordPolicies
DisablePasswordExpiration

Directory Synchronized User / CloudPasswordPolicyForPasswordSyncedUsersEnabled FALSE/ Managed Authentication

get-mgUser -UserId ManagedUser1@domain.net -Property PasswordPolicies | select -ExpandProperty PasswordPolicies
DisablePasswordExpiration

update-mgUser -UserId ManagedUser1@domain.net -PasswordPolicies None

get-mgUser -UserId ManagedUser1@domain.net -Property PasswordPolicies | select -ExpandProperty PasswordPolicies
None

Setting PasswordPolicies and Federated Domain Authentication (CloudPasswordPolicyForPasswordSyncedUsersEnabled TRUE)

The results are the same as CloudPasswordPolicyForPasswordSyncedUsersEnabled FALSE.

If attempting to set the value to NONE the command succeeds as the value was already set to NONE as a result of the feature enablement and subsequent password reset.

Update-MgUser -UserId FederatedUser1@domain.com -PasswordPolicies None

If attempting to set the value to DisablePasswordExpiration the command fails.

Update-MgUser -UserId FederatedUser1@domain.com -PasswordPolicies DisablePasswordExpiration
Update-MgUser : Unable to update the specified properties for on-premises mastered Directory Sync objects or objects
currently undergoing migration.

Setting Password Policies, Federated Domain Authentication, with Managed Authentication Staged Rollout (CloudPasswordPolicyForPasswordSyncedUsersEnabled TRUE)

The results are the same as “Setting PasswordPolicies and Federated Domain Authentication (CloudPasswordPolicyForPasswordSyncedUsersEnabled TRUE)” outlined in the previous section.

Setting Password Policies and Managed Domain Authentication (CloudPasswordPolicyForPasswordSyncedUsersEnabled TRUE)

The results are the same as “Setting Password Policies and Managed Domain Authentication (CloudPasswordPolicyForPasswordSyncedUsersEnabled FALSE)” outlined in a previous section.

get-mgUser -UserId ManagedUser3@domain.net -Property PasswordPolicies | select -ExpandProperty PasswordPolicies

update-MGUser -UserId ManagedUser3@domain.net -PasswordPolicies "DisablePasswordExpiration"

get-mgUser -UserId ManagedUser3@domain.net -Property PasswordPolicies | select -ExpandProperty PasswordPolicies
DisablePasswordExpiration

update-MGUser -UserId ManagedUser3@domain.net -PasswordPolicies "None"

get-mgUser -UserId ManagedUser3@domain.net -Property PasswordPolicies | select -ExpandProperty PasswordPolicies
None

Why did certain scenarios for the federated users work if the commands if update-MGUser does not work on federated domains?

In the federated scenario the only time that the command did not error was when it was setting a value that already existed on the object. For example, DisablePasswordExpiration was already set to running Update-MGUser -passwordPolicies DisablePasswordExpiration succeeded. When a graph call is made to set an attribute that already exists on the object with the same value the underlying API is not invoked. The call is then “successful” even though no attempt to change the value occurred.

Quick Reference Table

  • Cloud Only User
    • Managed Authentication
      • Default Value: NULL
      • Update-MGUser Accepted Values: DisablePasswordExpiration or NONE
  • Directory Synchronized User
    • CloudPasswordPolicyForPasswordSyncedUsersEnabled FALSE
      • Managed Authentication
        • Default Value: DisablePasswordExpiration
          • Update-MGUser Accepted Values: DisablePasswordExpiration or NONE
      • Federated Authentication
        • Default Value: DisablePasswordExpiration
        • Update-MGUser Accepted Values: No accepted values
    • CloudPasswordPolicyForPasswordSyncedUsersEnabled TRUE
      • Default Values All Authentication Types
        • Prior to password hash synchronization: DisablePasswordExpiration or NONE
        • Post password hash synchronization: None
        • New account creation post enablement: NULL
      • Managed Authentication
        • Update-MGUser Accepted Values: DisablePasswordExpiration or None
      • Federated Authentication
        • Update-MGUser Accepted Values: No accepted values

References

https://docs.azure.cn/en-us/entra/identity/authentication/concept-password-ban-bad-combined-policy

https://learn.microsoft.com/en-us/powershell/module/microsoft.graph.users/update-mguser?view=graph-powershell-1.0

https://learn.microsoft.com/en-us/powershell/module/microsoft.graph.identity.directorymanagement/get-mgdomain?view=graph-powershell-1.0

https://learn.microsoft.com/en-us/microsoft-365/admin/manage/set-password-expiration-policy?view=o365-worldwide

https://learn.microsoft.com/en-us/entra/identity/hybrid/connect/how-to-connect-password-hash-synchronization

https://learn.microsoft.com/en-us/microsoft-365/admin/add-users/set-password-to-never-expire?view=o365-worldwide

https://learn.microsoft.com/en-us/powershell/module/microsoft.graph.users/get-mguser?view=graph-powershell-1.0

https://learn.microsoft.com/en-us/powershell/module/microsoft.graph.identity.directorymanagement/update-mgdomain?view=graph-powershell-1.0

Automating external takeover for domains in Microsoft 365

Microsoft 365 customers have the ability to add custom domains for their organization. In order to utilize a custom domain, a proof of ownership process is required. For each domain added to a Microsoft 365 tenant a verification txt and mx record is created. This txt or mx record is placed in the public DNS provider for the domain and when located the domain is validated too the organization.

Background

In the Microsoft 365 admin center when verifying a domain, the domain verification process will fail if we believe the domain is validated on another tenant.

We have confirmed that you own 365.net, but we can't add it to your account because the domain is already added to a different Microsoft 365 organization: Test.onmicrosoft.com.

Sign in to the admin center as pil*******min@Test.onmicrosoft.com, or another admin for that organization, and remove the domain 365.net. Try resetting the admin password if you can't sign in. You should be able to add the domain 365.net here after taking that step.

If you can't access Test.onmicrosoft.com, please contact our support team for help.

This error would indicate that the domain is registered within another tenant. It is possible that the domain is registered in what is known as a “viral” or unmanaged tenant.

“Viral” or Unmanaged Tenants

What is a “viral” or unmanaged tenant? In prior versions of Microsoft 365 if a user enrolled in a trial service, and the email address utilized for registration was not associated with a Microsoft 365 tenant, an unmanaged tenant was provisioned. The domain was then added to the unmanaged tenant. The domain is not actually verified and a global administrator for the tenant does not exist. Most commonly I observe unmanaged tenants associated with PowerBI trials or Azure Rights Management services. Unmanaged tenants are no longer provisioned in association with trial services.

You can judge if a domain is viral using Powershell and a web request.

$domainName = "365.net"

$functionURL = "https://login.microsoftonline.com/common/userrealm/"+$domainName+"?api-version=2.1"

(Invoke-WebRequest $functionURL).content

If a domain is not unmanaged the output generally looks something like this:

Managed Authentication:

{"NameSpaceType":"Managed","Login":"365.net","DomainName":"365.net","FederationBrandName":" Test","TenantBrandingInfo":null,"cloud_instance_name":"microsoftonline.com"}

Federated Authentication:

{"NameSpaceType":"Federated","federation_protocol":"WSTrust","Login":"domain.com","AuthURL":"https://fs.domain.com/adfs/ls/?username=domain.com&wa=wsignin1.0&wtrealm=urn%3afederation%3aMicrosoftOnline&wctx=","DomainName":"domain.com","FederationBrandName":"Test","TenantBrandingInfo":null,"cloud_instance_name":"microsoftonline.com"}

If the domain is unmanaged the output generally looks something like this with IsViral:TRUE present in the return:

{"NameSpaceType":"Managed","Login":"domain.com","DomainName":"domain.com","FederationBrandName":"domain.com","IsViral":true,"TenantBrandingInfo":null,"cloud_instance_name":"microsoftonline.com"}

The steps in this article generally only work when the domain is marked as viral or unmanaged. If the domain is managed in another tenant, the steps can be tried but are unlikely to be successful. Domains managed in other tenants require Microsoft support intervention to claim ownership and can be engaged by opening a support case.

Microsoft provides two options to assume ownership of a domain when it is associated with an unmanaged tenant. These options are outlined in https://learn.microsoft.com/en-us/entra/identity/users/domains-admin-takeover.

Internal Takeover

The internal admin takeover method assumes that you have access to receive email at the domain that you are trying to takeover. In this process you establish a trial with the account you have access to, and then you convert the tenant from unmanaged to managed. Once a global administrator has been established, the domain can be gracefully removed.

External Takeover

If you have landed on this article, then you are most likely doing the external takeover method. It is not uncommon to need to use the external takeover method to complete the domain verification. In many cases the domain is not available on another platform to receive email precluding the use of the internal method. In order to perform the external takeover, the following steps are utilized:

  • Add the domain to the tenant where it should reside.
  • Obtain the TXT or MX record necessary for verification.
  • Ensuring that TXT or MX record is in external / public DNS.
  • Validate the domain through Microsoft Graph specifying a force takeover method.

NOTE: Unmanaged or viral tenants are Microsoft 365 World Wide Commercial tenants. You cannot perform an external takeover from a commercial to GCC High or DOD tenant. You must first perform the external takeover to a commercial tenant then remove and add the domain to your GCC High or DOD tenant.

Background: Automating External Takeover

To assist in performing the external takeover I have released a script to the Powershell Gallery. ForceDomainTakeover.ps1 will perform the following functions:

  • Prompt the user for necessary information including graph environment, tenant ID, domain name, and graph authentication method.
    • Graph authentication supports interactive user authentication or app registration with certificate authentication or client secret.
    • Optional external DNS server may be specified for DNS queries.
  • Perform a web request to determine if the domain is viral.
  • Ensure the domain is added to the specified tenant.
  • Enumerate the DNS verification records and test DNS for the presence of a TXT or MX verification record.
  • Attempt the external admin takeover and log the results.
  • Logs all information to the log directory creating the necessary files for any Microsoft support engagement.

The automated process will test to ensure that the domain is present in the tenant specified. If the domain is not present the administrator will be prompted to add the domain. If the administrator declines to add the domain the process will end. The process can be re-run and the domain added or the domain added through other means.

[6/22/2025 2:16:30 PM] - Enter TestDomainName
Resource '365.net' does not exist or one of its queried reference-property objects are not present.

Status: 404 (NotFound)
ErrorCode: Request_ResourceNotFound
Date: 2025-06-22T18:16:32

Headers:
Transfer-Encoding             : chunked
Connection                    : keep-alive
Vary                          : Accept-Encoding
Strict-Transport-Security     : max-age=31536000
request-id                    : 2bb91cec-d88e-4394-86a4-bef490f00dd5
client-request-id             : dec3375c-402f-4e88-8ee9-fb6a4db82be7
x-ms-ags-diagnostic           : {"ServerInfo":{"DataCenter":"East US 2","Slice":"E","Ring":"5","ScaleUnit":"002","RoleInstance":"BN2PEPF0000365B"}}
x-ms-resource-unit            : 1
X-Cache                       : CONFIG_NOCACHE
Cache-Control                 : no-cache
Date                          : Sun, 22 Jun 2025 18:16:32 GMT


[6/22/2025 2:16:31 PM] - Specified Domain 365.net is not added to the specified tenant.
Add domain to tenant to proceed? Y/N:

The automated process will also verify that either the TXT or MX record for the domain is present in external DNS. If the records are not present an error is displayed providing the administrator with the correct records to create.

[6/22/2025 2:17:20 PM] - Testing to verify that public DNS is updated with verification records.
[6/22/2025 2:17:20 PM] - Enter TestDNSRecords
[6/22/2025 2:17:20 PM] - MS=ms55782524
[6/22/2025 2:17:20 PM] - ms55782524.msv1.invalid
[6/22/2025 2:17:20 PM] - M365 TXT Record: MS=ms55782524
[6/22/2025 2:17:20 PM] - M365 MX Record: ms55782524.msv1.invalid
[6/22/2025 2:17:20 PM] - Testing public DNS records.
[6/22/2025 2:17:20 PM] - TXT record not found in public dns.
[6/22/2025 2:17:20 PM] - TXT record not found in public dns.
[6/22/2025 2:17:20 PM] - TXT record not found in public dns.
[6/22/2025 2:17:20 PM] - MX record not found in public dns.
[6/22/2025 2:17:20 PM] -

 Either TXT Record [Most Common]: MS=ms55782524 or MX Record: ms55782524.msv1.invalid must be present in public dns.
 If the domain was recently added please add either of this records to proceed.


ClientId               : 14d82eec-204b-4c2f-b7e8-296a70dab67e
TenantId               : f7d9d2a4-dded-4f6f-90a9-5011281137b9
Scopes                 : {Application.Read.All, AuditLog.Read.All, Directory.Read.All, Directory.ReadWrite.All...}
AuthType               : Delegated
TokenCredentialType    : InteractiveBrowser
CertificateThumbprint  :
CertificateSubjectName :
SendCertificateChain   : False
Account                : Administrator
AppName                : Microsoft Graph Command Line Tools
ContextScope           : CurrentUser
Certificate            :
PSHostVersion          : 5.1.26100.4202
ManagedIdentityId      :
ClientSecret           :
Environment            : Global

out-logfile : [6/22/2025 2:17:20 PM] -

 Either TXT Record [Most Common]: MS=ms55782524 or MX Record: ms55782524.msv1.invalid must be present in public dns.
 If the domain was recently added please add either of this records to proceed.

At C:\Program Files\WindowsPowerShell\Scripts\ForceDomainTakeover.ps1:797 char:9
+         out-logfile -string ("`n `n Either TXT Record [Most Common]:  ...
+         ~~~~~~~~~~~~~~~~~~~~~~~~~~~~~~~~~~~~~~~~~~~~~~~~~~~~~~~~~~~~~
    + CategoryInfo          : NotSpecified: (:) [Write-Error], WriteErrorException
    + FullyQualifiedErrorId : Microsoft.PowerShell.Commands.WriteErrorException,Out-LogFile

To start utilizing the script:

Install-Script ForceDomainTakeOver
Update-Module Microsoft.Graph.Authentication
Update-Module Microsoft.Graph.Identity.DirectoryManagement

If the script errors on attempting the force, make a secondary attempt and specify the beta endpoint – examples below.

Examples: ForceDomainTakeOver

#Run script and prompt for all necessary information / interactive authentication only

ForceDomainTakeover.ps1 -logFolderPath c:\temp
#Run script and prompt for interactive authentication only.

ForceDomainTakeover.ps1 -logFolderPath c:\temp -domainName "test.net" -msGraphEnvironmentName "Global" -msGraphTenantID "Azure-Tenant-ID" 
#Run the script and prompt for interactive credentials only - GCC High.

ForceDomainTakeover.ps1 -logFolderPath c:\temp -domainName "test.net" -msGraphEnvironmentName "USGov" -msGraphTenantID "Azure-Tenant-ID" 
#Run the script and utilize a graph app registration with certificate authentication.

ForceDomainTakeover.ps1 -logFolderPath c:\temp -domainName "test.net" -msGraphEnvironmentName "Global" -msGraphTenantID "Azure-Tenant-ID" -msGraphCertificateThumbprint "CertThumbprint" -msGraphApplicationID "ApplicationID"
#Run the script and utilize a graph app registration with client secret.

ForceDomainTakeover.ps1 -logFolderPath c:\temp -domainName "test.net" -msGraphEnvironmentName "Global" -msGraphTenantID "Azure-Tenant-ID" -msGraphClientSecret "ClientSecret" -msGraphApplicationID "ApplicationID"
#Run script and prompt for interactive credentials only / use graph beta endpoint

ForceDomainTakeover.ps1 -logFolderPath c:\temp -domainName "test.net" -msGraphEnvironmentName "Global" -msGraphTenantID "Azure-Tenant-ID" -msGraphUseBeta:$TRUE

A complete list of all debug information including the output from each step of the command is stored within the log file directory. The log file directory can be zipped and attached to a support case should support from Microsoft be required.

Microsoft 365 GCC High Tenants and Missing Domains

Microsoft 365 provides a Government Community Cloud High offering for the U.S Government, contractors, and other organizations that qualify. As with our commercial or worldwide tenants many customers elect to add a vanity or custom domain to their M365 GCC-H tenant.

In a typical commercial tenant the vanity domains are managed through the domains tab of the Microsoft 365 Administration Center. Here is a sample instructions for commercial customers – https://learn.microsoft.com/en-us/microsoft-365/admin/setup/add-domain?view=o365-worldwide.

In the M365 Admin Center for GCC-H tenants the domains tab is missing. This is currently by design. When adding, verifying, or removing domains in a GCC-H tenant Microsoft Graph must be utilized. In this post I want to outline the manual steps for adding and verifying a domain in a GCC-H tenant.

Graph commands often span multiple PowerShell modules in order to achieve their work. Prior to running any graph commands, I recommend that all associated graph PowerShell modules be updated. This ensures that you do not have a mismatch, for example, between the authentication module and the identity module. Note: This process can take a long time depending on the number of graph modules you have installed.

Get-InstalledModule Microsoft.Graph.* | Update-InstalledModule -force -confirm:$FALSE

If you are new to graph or to ensure that you have the module necessary to perform domain work, the Microsoft.Graph.Identity.DirectoryManagement module must be installed.

Install-Module Microsoft.Graph.Identity.DirectoryManagement

When adding and verifying the domain there are three graph commands that will be utilized.

In order to run the following commands, the graph permission Domain.ReadWrite.All must either be consented to on the individual account or for the entire organization. Note: If you do not have global administrator privileges you will not be able to provide consent for graph scopes. It may be necessary for another administrator to perform the consent on your behalf.

The process to add a domain via graph:

$tenantID = "Entra Tenant ID for the GCC H" organization" #User Supplied
$scopes = "Domain.ReadWrite.All"
$environment = "USGov"

Connect-MgGraph -Environment $environment -TenantId $tenantID -Scopes $scopes
$domainID = "contoso.com"

$params = @{
	id = $domainID
}

new-MGDomain -bodyParameter $params

If the new-MGDomain command is successful the following return is expected.

Id          AuthenticationType AvailabilityStatus IsAdminManaged IsDefault IsInitial IsRoot IsVerified Manufacturer Mod
                                                                                                                    el
--          ------------------ ------------------ -------------- --------- --------- ------ ---------- ------------ ---
contoso.com Managed                               True           False     False     False  False

Once the domain has been added with new-MGDomain the DNS verification records are obtained. In the below example for the record type TXT you would use the value MS=ms41165256 or for the record type MX you would use ms41165256.msv1.invalid with preference 32767.

$dnsRecords = get-MGDomainVerificationDNSRecord -domainID $domainID
$dnsRecords | fl

Id                   : aceff52c-06a5-447f-ac5f-256ad243cc5c
IsOptional           : False
Label                : contoso.com
RecordType           : Txt
SupportedService     : Email
Ttl                  : 3600
AdditionalProperties : {[@odata.type, #microsoft.graph.domainDnsTxtRecord], [text, MS=ms41165256]}

Id                   : 5fbde38c-0865-497f-82b1-126f596bcee9
IsOptional           : False
Label                : contoso.com
RecordType           : Mx
SupportedService     : Email
Ttl                  : 3600
AdditionalProperties : {[@odata.type, #microsoft.graph.domainDnsMxRecord], [mailExchange, ms41165256.msv1.invalid],
                       [preference, 32767]}

These records are inserted into your commercial DNS provider for the domain you are adding. Please note that it can take several minutes for your new public DNS records to be accessible. You may consider using a third party tool or nslookup to validate that the DNS records are available prior to proceeding with the next step.

confirm-MGDomain -domainID $domainID

If the confirm is successful, the domain will be validated and available in the M365 GCC-H tenant.

To complete the integration of custom domains with Microsoft 365 services you have to publish additional DNS records. For GCC-H tenants these DNS records must be calculated manually. You can find resources for calculating these DNS records at https://learn.microsoft.com/en-us/microsoft-365/enterprise/dns-records-for-office-365-gcc-high?view=o365-worldwide.

Using GraphLicenseManager to view group members and reprocess users…

When using group based licensing errors may arise in the license assignment process. In the Microsoft 365 Administrative Center when selecting a license, expanding groups, the list of groups assigning that license are displayed along with the groups processing status.

To review the errors associated with the license assignment the group may be selected from this view. This will display the list of users that require action and provide information regarding the failure status.

In this example the license assignment is failing due to conflicting service plans. As discussed in other articles this is a common error when two license assignments are occurring and each license contains a plan that conflicts with one another. To reprocess a license assignment the users may be selected in bulk or individually and the reprocess button selected.

When reprocessing is successful the user will be removed from the actions needed dialog. If reprocessing of a user fails a red error banner is displayed.

In the M365 Admin Center when an error is encountered during reprocessing there is little diagnostic information provided as to the cause of the failure. To discover the cause of the failure the audit log entries in the Entra portal for the users must be reviewed.

In the audit log when reviewing the “change user license” activity the license error message provides the feedback necessary to understand the error.

The license can't be assigned because the user has licensed service plans that conflict with plans in the new license. Resolve these conflicting service plan pairs to solve this problem: [7547a3fe-08ee-4ccb-b430-5077c5041653, 2078e8df-cff6-4290-98cb-5408261a760a]. Licenses being added: [314c4481-f395-4525-be8b-2ec4bb1e9d91]

The current design of the M365 Admin Center does not include this verbose information requiring the administrator to utilize multiple tools to understand the nature of the failure.

In version 1.1.3 of the GraphLicenseManager the ability to review group members and reprocess individual license assignments has been added. In addition, any reprocessing failures are presented to the administrator at reprocessing time combining both reprocessing and failure assessment into the same tool.

To utilize the GraphLicenseManager to perform this work:

Set-ExecutionPolicy Unrestricted
Install-Module GraphLicenseManager
Start-GraphLicenseManager -logFolderPath c:\temp

When the GraphLicenseManager starts a logon screen is displayed to connect to Microsoft Graph. The module supports either interactive authentication or certificate based authentication.

When selecting interactive authentication, the administrator may select the scopes required to perform functions in the license manager. The default settings are the least permissions required to perform functions. When using the GraphLicenseManager to view group members, group member errors, and reprocess users the optional user permissions must be specified. Setting any user permissions will enable the option to view group membership and group processing errors. Setting user permissions to Directory.ReadWrite.All or User.ReadWrite.All will enable the reprocessing option in the group members view.

When using certificate authentication, the appropriate permissions must be assigned to the app registration created in Entra. The same permissions for interactive authentication are required for the app registration.

If no user permissions are selected the module will examine all scopes returned in the graph connection. If the scopes returned contain the necessary permissions to view group members and / or reprocess group errors those options are automatically enabled.

After completing the connection to Microsoft Graph the Group License Manager is displayed. Searching a group object id displays the licenses assigned to the group and a table of all license information within the tenant. If the necessary graph scopes are available the “View Group Info” button is enabled in the center of the manager.

Selecting the “View Group Info” button displays the “Group Information Page” Note: As this page enumerates a table of all members for review it can take some time to render the information.

The group information display shows all the members of the group, all group license errors, and basic information regarding the processing status and group statistics. In the “Group License Errors” table a user may be elected for reprocessing. If the necessary graph scopes are abled the “Reprocess Selected Users” and “Refresh License Errors” buttons are enabled.

To reprocess a user select one or more users and the reprocess selected users button.

In this example selecting a user and the reprocess option shows an error message.

This is expected since the users are in error, and nothing has been done to correct the condition. The error message provides information regarding the license plans in conflict. The guids can be searched to determine which plan and sku are generating the conflict. In this example the plans in conflict are the Yammer plans. There are multiple potential methods to resolve this issue but for the sake of this example I will simply remove the offending license.

With the conflict resolve the reprocess option may be utilized. If the license reprocessing is now successful for all users selected a success message is displayed.

To confirm that all errors on the group have been rectified the “Refresh License Errors” button is selected. This refreshes the group license errors. In this example all license errors are now clear.

I hope that by bringing together the ability to manage group licenses and group license errors into a single tool we can make the adoption and management of group-based licensing simpler and more efficient.

Using graph to modify group based licenses…

Microsoft Graph provides the ability to modify licenses assigned to groups when implementing group-based licensing. The command set-MGGroupLicenses is utilized to modify the license template assigned to a group.

Set-MGGroupLicense

When creating a license template to apply or modify on the group a bodyParameters switch is utilized. Building the bodyParameters by hand can often be tricky. In this post I want to break down the structure of the bodyParameters and demonstrate how this can be built easily with Powershell.

The bodyParameters starts with a hash table that contains two array entries. The add licenses array and the remove licenses array. (Black box in figure below).

The add licenses array is an array of hash tables. (Green Box). Each hash table entry in the array is a combination of an array of plans to disable (Purple Box) and the skuID associated with those plans (Blue Box).

The remove licenses array is an array of skuIDs to remove from the group. (Red Box).

This is what the structure looks like in Microsoft’s sample documentation.

On the current group is the Office 365 A1 for Students License. This license needs to be replaced with the Microsoft 365 E5 licenses with the Information Barries and Microsoft 365 Phone System plans disabled. I also want to add the entire Microsoft 365 Defender for Office 365 (Plan 2) license.

To recap

  • Remove Licenses
    • Office 365 A1 for Students = 314c4481-f395-4525-be8b-2ec4bb1e9d91
  • Add Licenses
    • Microsoft 365 E5 = 06ebc4ee-1bb5-47dd-8120-11324bc54e06
      • Disable Microsoft 365 Phone System = 4828c8ec-dc2e-4779-b502-87ac9ce28ab7
      • Disable Information Barriers = c4801e8a-cb58-4c35-aca6-f2dcc106f287
    • Microsoft Defender for Office 365 (Plan 2) = 3dd6cf57-d688-4eed-ba52-9e40b5468c3e

To build the body parameters utilize in the set-MGGroupLicenseCommand:

#Establish the body parameters hash table.
$params = @{}

#Build the add licenses array
$addLicenses = @()

#Build the remove licenses array
$removeLicenses = @()

#************************************************************************

#Build the disabled plans for the first license to be added.

$disabledPlans = @()
$disabledPlans += "4828c8ec-dc2e-4779-b502-87ac9ce28ab7"
$disabledPlans += "c4801e8a-cb58-4c35-aca6-f2dcc106f287"

#Set the skuID for the first license.

$skuID = "06ebc4ee-1bb5-47dd-8120-11324bc54e06"

#Build the hash value for the added licenses.

$skuHash = @{"DisabledPlans" = $disabledPlans ; "SkuID" = $skuID}

#Add the skuHash to the array of licenses to add.

$addLicenses += $skuHash

#************************************************************************

#Build the second entry to the add licenses.

#Build the disabled plans for the second license to be added.

$disabledPlans = @()

#Set the skuID for the first license.

$skuID = "3dd6cf57-d688-4eed-ba52-9e40b5468c3e"

#Build the hash value for the added licenses.

$skuHash = @{"DisabledPlans" = $disabledPlans ; "SkuID" = $skuID}

#Add the skuHash to the array of licenses to add.

$addLicenses += $skuHash

#************************************************************************

#***********************
#At this time all licenses to be added have been built and added to the addArray.
#***********************

#Update the licenses to remove with the decomissioned plan.

$removeLicenses += "314c4481-f395-4525-be8b-2ec4bb1e9d91"

#***********************
#Complete the params has table.
#***********************

$params = @{"AddLicenses" = $addLicenses ; "RemoveLicenses" = $removeLicenses}

In some instances, discovering the SKU and PLAN ids utilized in the body parameters configuration can also be challenging. One of the methods I like to use to simplify process is to create a standard user in Microsoft 365 and apply the license template to the user. The license template would be the same as the template I want to assign to the group. The user can then be utilized as a template for completing the body parameters build.

#Obtain the user that has the license template to be applied.

$licenseTemplateUser = get-mgUser -userID licenseTest@domain.onmicrosoft.com -Property AssignedLicenses

#Establish the body parameters hash table.
$params = @{}

#Build the add licenses array
$addLicenses = @()

#Build the remove licenses array
$removeLicenses = @()

#************************************************************************

#Build the licenses to be added.

foreach ($sku in $licenseTemplateUser.AssignedLicenses)
{
    write-host ("Processing skuID: "+$sku.skuID)

    #Set the SKUID

    $skuID = $sku.skuID

    if ($sku.disabledPlans.count -gt 0)
    {
        write-host "The sku has disabled plans - creating disabled plans."

        foreach ($plan in $sku.disabledPlans)
        {
            write-host $plan
            $disabledPlans+=$plan
        }
    }
    else
    {
        $disabledPlans=@()
    }

    #Build the hash for the sku.

    $skuHash = @{"DisabledPlans" = $disabledPlans ; "SkuID" = $skuID}

    #Add the has to the add licenses array.

    $addLicenses += $skuHash
}

#Set any licenses to be removed.

$removeLicenses += "314c4481-f395-4525-be8b-2ec4bb1e9d91"

#***********************
#Complete the params has table.
#***********************

$params = @{"AddLicenses" = $addLicenses ; "RemoveLicenses" = $removeLicenses}

I hope that outlining the structure of the bodyParameters simplifies utilizing graph for group based license administration.

EntraID Group Owners and Exchange Online ManagedBy

In the EntraID Portal groups that are created directly in Microsoft 365 or synchronized from Active Directory are displayed. One of the attributes that is present on groups in EntraID is the Owners attribute. A common question I receive from customers is that the owners attribute synchronized from Active Directory does not match the owners attribute of the same group in EntraID.

Managers for groups in Active Directory can be established either by setting the Manager field in Active Directory Users and Computers or by using the Exchange Management Shell / Exchange Control Panel. When in ADUC and on the Managed By tab, the name field displays the distinguished name of the manager and is represented in the LDAP attribute managedBy.

In Exchange on-premises installations groups often have more than one manager. Exchange achieves this by writing the first manager to the LDAP attribute managedBy and all subsequent managers to the LDAP attribute msExchCoManagedByLink. ADUC has no knowledge of the additional attributes. The Exchange Management Shell and Exchange Control Panel include managers from both LDAP fields when displaying the managedBy representation.

Get-DistributionGroup ManagedBy | fl managedBy


ManagedBy : {home.domain.com/DLConversion/MigrationTest/Manager User0,
            home.domain.com/DLConversion/MigrationTest/Manager User1,
            home.domain.com/DLConversion/MigrationTest/ManagerGroup}

The managers of an object in Active Directory can be any valid security principal, for example, a user or security group. In the above example the group is managed by two users and a security group. Here is the same representation from Active Directory:

PS C:\> Get-ADGroup -Identity "CN=ManagedBy,OU=MigrationTest,OU=DLConversion,DC=home,DC=domain,DC=com" -Properties managedBy,msExchCoManagedByLink


DistinguishedName     : CN=ManagedBy,OU=MigrationTest,OU=DLConversion,DC=home,DC=domain,DC=com
GroupCategory         : Security
GroupScope            : Universal
ManagedBy             : CN=Manager User0,OU=MigrationTest,OU=DLConversion,DC=home,DC=domain,DC=com
msExchCoManagedByLink : {CN=Manager User1,OU=MigrationTest,OU=DLConversion,DC=home,DC=e-domain,DC=com,
                        CN=ManagerGroup,OU=MigrationTest,OU=DLConversion,DC=home,DC=domain,DC=com}
Name                  : ManagedBy
ObjectClass           : group
ObjectGUID            : c0e9ed6c-22f4-4305-a69a-aee56f0c53b1
SamAccountName        : ManagedBy
SID                   : S-1-5-21-278042269-1514808692-1118015945-448669

In EntraID Connect when an object is synchronized the managedBy and msExchCoManagedByLink attributes are included in the synchronization attribute set. You can observe this by performing a metaverse search on the group and reviewing the attributes discovered during the synchronization process.

A synchronized group is available in the EntraID Portal under groups. When reviewing the group properties a owners field is displayed. The owners field in this case appears empty and no owners are displayed.

If the managers are synchronized, then why is the owners field empty? Owners is not equal to managers. Active Directory Groups or legacy distribution and security groups created in Exchange Online do not have owners they have managers. Managers are not the same as owners at the directory level therefore the owners field is not populated with managers.

In order to review the managers of a group you have to review the properties of the group within Exchange Online.

PS C:\> Get-DistributionGroup ManagedBy | fl managedBy


ManagedBy : {04cfbcd4-42a0-4c60-8220-4488a6af4431, f7aff7bf-3036-4e26-a193-75a28de751f3}

In this instance the managers are represented by the externalDirectoryObjectID of the recipients. If the recipients existed prior to setting the name attribute to externalDirectoryObjectID the name of the user may be displayed.

PS C:\> Get-Recipient 04cfbcd4-42a0-4c60-8220-4488a6af4431 | fl displayName


DisplayName : Manager User0


PS C:\> Get-Recipient f7aff7bf-3036-4e26-a193-75a28de751f3 | fl displayName


DisplayName : Manager User1

In this example both of the USERS that have manager rights on the group are represented in Exchange Online. Earlier though there were three managers, two were users and the remaining a security group. Unfortunately, Exchange Online does not forward sync any other manager except for user types. The group is synchronized to Entra ID as a manager, but will not be represented on the group in Exchange Online. There is no workaround for this behavior except adding individual members to a manager field in Active Directory.

If the owners field in EntraID does not match the managers then why does the owners field exist? The owners field is utilized to display owners of the Microsoft 365 Group type. These groups are often referred to as modern or universal groups. Setting the owners attribute in EntraID or Exchange Online subsequently adjusts the owners across all Microsoft 365 services.

PS C:\> Get-UnifiedGroupLinks -Identity ManagedBy-M365Group -LinkType Owners

Name                                 RecipientType
----                                 -------------
04cfbcd4-42a0-4c60-8220-4488a6af4431 MailUser
f7aff7bf-3036-4e26-a193-75a28de751f3 MailUser

Synchronized groups or distribution / security groups created in Exchange Online do not have owners in EntraID.

EntraID / Office 365: Using Graph Powershell to list domain DNS records…

In the Microsoft 365 Administration center administrators can review the domains they have verified and added to Microsoft 365 services. When a domain is validated and provisioned, the domain name services (DNS) records that are provisioned in Microsoft 365 are displayed for the administrator. This may include records such as the MX record for Exchange Online or the device management records for Intune support.

If the domains blade is not available to you in the Microsoft 365 Administration Center, it is possible to obtain these same records through Microsoft Graph. To obtain the DNS records the command Get-MGDomainServiceConfigurationRecord can be utilized. For API permissions necessary to utilize this command reference the following API permissions guidance.

Whenever utilizing Microsoft Graph commands I always recommend ensuring that the graph commands are running the latest non-preview version. To accomplish this task administrators may run:

Get-InstalledModule Microsoft.Graph.* | update-Module

If you have not yet installed any of the graph modules there are only two modules that are required in order to execute these commands.

Install-Module Microsoft.Graph.Authentication
Install-Module Microsoft.Graph.Identity.DirectoryManagement

Once the necessary modules have been installed or updated a connection to the Microsoft Graph endpoints must be established. In this example interactive authentication is utilized to establish the connection and prompt the user for credentials. The scopes parameter requests the least restrictive permissions to perform this operation. When connecting with graph command if a scope is not consented to for the particular user either consent can be granted by the user (assuming appropriate rights) or an administrator will be required to grant consent. I also provide the tenantID as a part of the connection. The tenantID can be obtained from the Entra ID portal associated with the domain. This ensures that the connection is made with the appropriate tenant.

connect-MGGraph -scopes "Domain.Read.All" -tenantID "00000000-0000-0000-0000-000000000000"

This is a sample consent screen

The command can then be issued using the domain name.

$records = Get-MgDomainServiceConfigurationRecord -DomainId domain.net

The information of particular interest is stored within the additionalProperties of each entry. The following command will help organize and interpret the information:

PS C:\> foreach ($record in $records) { $record.label ; $record.AdditionalProperties | ft}
domain.net

Key          Value
---          -----
@odata.type  #microsoft.graph.domainDnsMxRecord
mailExchange domain-net0c.mail.protection.outlook.com
preference   0


domain.net

Key         Value
---         -----
@odata.type #microsoft.graph.domainDnsTxtRecord
text        v=spf1 include:spf.protection.outlook.com -all


autodiscover.domain.net

Key           Value
---           -----
@odata.type   #microsoft.graph.domainDnsCnameRecord
canonicalName autodiscover.outlook.com


_sip._tls.domain.net

Key         Value
---         -----
@odata.type #microsoft.graph.domainDnsSrvRecord
nameTarget  sipdir.online.lync.com
port        443
priority    100
protocol    _tls
service     _sip
weight      1


sip.domain.net

Key           Value
---           -----
@odata.type   #microsoft.graph.domainDnsCnameRecord
canonicalName sipdir.online.lync.com


lyncdiscover.domain.net

Key           Value
---           -----
@odata.type   #microsoft.graph.domainDnsCnameRecord
canonicalName webdir.online.lync.com


_sipfederationtls._tcp.domain.net

Key         Value
---         -----
@odata.type #microsoft.graph.domainDnsSrvRecord
nameTarget  sipfed.online.lync.com
port        5061
priority    100
protocol    _tcp
service     _sipfederationtls
weight      1


domain.net

Key           Value
---           -----
@odata.type   #microsoft.graph.domainDnsCnameRecord
canonicalName domain.sharepoint.com


msoid.domain.net

Key           Value
---           -----
@odata.type   #microsoft.graph.domainDnsCnameRecord
canonicalName clientconfig.microsoftonline-p.net


enterpriseregistration.domain.net

Key           Value
---           -----
@odata.type   #microsoft.graph.domainDnsCnameRecord
canonicalName enterpriseregistration.windows.net


enterpriseenrollment.domain.net

Key           Value
---           -----
@odata.type   #microsoft.graph.domainDnsCnameRecord
canonicalName enterpriseenrollment-s.manage.microsoft.com

If the DNS record contains a name within the domain this is represented by the label. The @odata.type provides the type of DNS record expected and the value column lists the value of that record.

enterpriseenrollment.domain.net

Key           Value
---           -----
@odata.type   #microsoft.graph.domainDnsCnameRecord
canonicalName enterpriseenrollment-s.manage.microsoft.com

The previous example would be interpreted as:

DNS Record Name = enterpriseenrollment.domain.net

DNS Record Type = CNAME

DNS Record Value = enterpriseenrollment-s.manage.microsoft.com

domain.net

Key          Value
---          -----
@odata.type  #microsoft.graph.domainDnsMxRecord
mailExchange domain-net0c.mail.protection.outlook.com
preference   0

The previous example would be interpreted as:

DNS Domain = domain.net

DNS Record Type = MX

DNS Record Value = domain-net0c.mail.protection.outlook.com

DNS Record Preference = 0

In this case an MX record does not have a specific DNS host name unlike other records.

These commands should unblock scenarios where the domains blade is unavailable to you and you need to know the appropriate DNS records to create for your Office 365 integration.

Microsoft account unusual sign-in activity

Microsoft offers a variety of consumer services that end users may sign up for. For example, Xbox accounts, personal OneDrive accounts, and personal office subscriptions. Users may elect to create an account using a Microsoft owned domain (live.com / outlook.com) or through another domain (gmail.com, etc). 

At one time it was possible for users to utilize addresses that were also registered in Office 365. This would essentially allow a user to take their corporate email address and utilize it as an account both in our commercial services and our consumer services. This ability is now blocked once a domain has been added and registered to an Office 365 tenant.

If a user has both an Office 365 and consumer account registered to the same address this generally means:

  • The user established the account prior to when the domain was registered in Office 365.
  • The user established the account prior to the block demonstrated above.

In recent weeks I have spoked with several customers that have raised escalations regarding “Microsoft Account Unusual Sign-in Activity”. In each of these cases the user received an email to their Office 365 email address indicating that unusual sign on activity occurred. When administrators of the tenant were engaged, they were unable to locate any evidence of abnormal sign-ons. The emails originate from “account-security-noreply@accountprotection.microsoft.com” and are addressed to the Office 365 recipient.

In most cases the email address in the TO: line also matches the email address that is obscured. 

When examining the email there are some methods to determine that this event is related to a consumer account. The first method involves reviewing the links contained in the email. In this case there are two links and in each case the links point to accessing consumer services:

Another easy method of confirming if the user has both an Office 365 and consumer account is to launch a browser in in-private mode. Access https://portal.office.com and specify the account email address. If the user is prompted to access either a “Work or School” and a “Personal Account” the user has both.

The last method of verify that a user has both an Office 365 account and a personal account is for administrators to utilize Powershell and our identity tools module. The command has the ability to extract for administrators the presence of a consumer account associated with an Office 365 identity.

Install-Module -Name MSIdentityTools 
Get-MsIdHasMicrosoftAccount -Mail "use@e-domain.com"
True

In this case the return value of TRUE confirms that the user has a consumer identity. 

The user that owns the consumer account should be advised to access the account and review the sign on activity. Administrators may also recommend that the user disassociate their corporate identity from the consumer account using the following instructions: Change the email address or phone number for your Microsoft account (Opens in new window or tab)

Administrators may also find the following information helpful regarding commercial and consumer account overlap.

Unable to apply the F5 Security + Compliance Add-On in GCC Tenants

In 2021 Microsoft introduced a security and compliance add-on license for front line workers. 

Information regarding the add-on may be found here:

https://www.microsoft.com/en-us/licensing/news/new_f5_security_and_compliance_offer_for_frontline_workers

In GCC tenants when administrators attempt to assign this license to users an error maybe encountered.

"This user won't be able to have license assigned because you need to assign more additional services. Please re-assign license in this user's property page."

When the F5 Security and Compliance add-on was released to GCC the Exchange Online Archiving component was incorrectly included. The plan originally included was for non-GCC tenants. To correct this issue the correct Exchange Online Archiving for Government plan was introduced into the F5 Security + Compliance sku. When pulling the sku properties and reviewing plans the following may be noted:

When selecting the entire license to be applied to the user both the Exchange Online Archiving and Exchange Online Archiving for Government plans are automatically selected. It is the attempt to apply the Exchange Online Archiving plan that causes the license assignment to fail.

To assign the license administrators must manually unselect the plan Exchange Online Archiving leaving only the Exchange Online Archiving for Government selected. 

Entra Connect and Single Object Deletion

It may become necessary to purge an object an Entra Connect connector space. A connector space exists for each directory that is added to an Entra Connect installation. Typical installations have two connector spaces, one for the local Active Directory and the other for Entra ID. More complex installations may have more than one connector space for Active Director.

When a user object is synchronized to Entra ID the Active Directory attributes are read into the Active Directory connector space. When the object is successfully written to Entra ID, the Entra ID attributes are read into the Entra ID connector space.

In some instances, it becomes necessary to purge the information within a connector space in order to fix a synchronization issue. Purging an object from a connector space allows the Entra Connect process to re-read the objects properties from the directory where the deletion occurred. For example, purging an object from the Active Directory and Entra ID connector spaces will force the object to be re-read from both directories and sync operation performed on the refreshed attributes. It is also possible to remove an object from either of the connector spaces without removing it from both.

To facilitate this process, I have released a script to the Powershell Gallery that automates the remove of the object from one or both connector spaces. The script offers several options to execute.

To save this script to your entra connect server perform the following:

Install-Script Reset-EntraConnectObject

This saves the scripts to the local path. 

The script provides a variety of options for execution each performing slightly different functions. 

Option 1:

This option is used when the Active Directory and Entra Connect distinguished names are both known. This information is generally obtained from a metaverse search and copying the respective distinguished names from the connector spaces. When executed the connector space objects are extracted by distinguished name and a deletion from the connector spaces is processed. A single item synchronization is automatically triggered to refresh each connector space with the objects properies.

reset-EntraConnectObject.ps1 -logFolderPath c:\temp -EntraDN "CN={4272736E37395A7742456D3474535578366A746558413D3D}" -ADObjectDN "CN=Tim McMichael,OU=Users,OU=Objects,DC=home,DC=domain,DC=com"

Option 2

This option is used when only Active Directory information is known, and an object deletion should occur from both the Active Directory and Entra connector spaces. When executed an Active Directory call is made to locate the user by either distinguished name, objectGUID, or mail attribute. This call is made using the specified domain controller and credentials. When the user is located the sourceAnchor for the Entra Connect installation is determined and the Entra ID distinguished name is automatically calculated. A deletion from each connector space is processed. A single item synchronization is automatically triggered to refresh each connector space with the object properties. This is helpful if you only have access to the Active Directory information or are unable to perform a metaverse search to determine distinguished name values.

#If get-credential returns an error message "Get-Credential : Cannot process command because of one or more missing mandatory parameters: Credential" do the following:

Set-ItemProperty "HKLM:\SOFTWARE\Microsoft\PowerShell\1\ShellIds" -Name "ConsolePrompting" -Value $True

Option 2A: Remove object by Active Directory Distinguished Name

#The following instructions locate the object by Active Directory Distinguished Name

$cred = get-credential #Provide credential of person with rights to read attributes from active directory

$globalCatalogServer = "DC.domain.com" #FQDN of a global catalog server

$DN = "CN=Tim McMichael,OU=Users,OU=Objects,DC=home,DC=domain,DC=com"

reset-EntraConnectObject.ps1 -logFolderPath c:\temp -ADObjectDN $dn -globalCatalogServer $globalCatalogServer -activeDirectoryCredential $cred

Option 2B: Remove object by Active Directory Mail Attribute

#The following instructions locate the object by Active Directory Mail Attribute 

$cred = get-credential #Provide credential of person with rights to read attributes from active directory

$mail = "tim@domain.com" #Active directory mail attribute

$globalCatalogServer = "DC.Domain.com"

reset-EntraConnectObject.ps1 -logFolderPath c:\temp -ADObjectmail $mail -activeDirectoryCredential $cred -globalCatalogServer $globalCatalogServer

Option 2C: Remove object by Active Directory ObjectGUID

#The following instructions locate the object by Active Directory objectGUID

$cred = get-credential #Provide credential of person with rights to read attributes from active directory

$globalCatalogServer = "DC.domain.com" #FQDN of a global catalog server

$objectGUID = "ef27bb06-70d6-4904-b8b5-2531ea3b5e5c"

reset-EntraConnectObject.ps1 -logFolderPath c:\temp -ADObjectGUID $objectGUID -activeDirectoryCredential $cred -globalCatalogServer $globalCatalogServer

Option 3

This option is utilized when you only want to purge information from the Active Directory connector space. Generally, this is reserved for specific scenarios under the guidance of support. It functions in the same manner as Option 2 with the exception that no Entra ID distinguished name is calculated.

Option 3A: Remove object by Active Directory Distinguished Name

#The following instructions locate the object by Active Directory Distinguished Name

$cred = get-credential #Provide credential of person with rights to read attributes from active directory

$globalCatalogServer = "DC.domain.com" #FQDN of a global catalog server

$DN = "CN=Tim McMichael,OU=Users,OU=Objects,DC=home,DC=domain,DC=com"

reset-EntraConnectObject.ps1 -logFolderPath c:\temp -ADObjectDN $dn -globalCatalogServer $globalCatalogServer -activeDirectoryCredential $cred -calculateEntraDN:$FALSE

Option 3B: Remove object by Active Directory Mail Attribute

#The following instructions locate the object by Active Directory Mail Attribute 

$cred = get-credential #Provide credential of person with rights to read attributes from active directory

$mail = "tim@domain.com" #Active directory mail attribute

$globalCatalogServer = "DC.Domain.com"

reset-EntraConnectObject.ps1 -logFolderPath c:\temp -ADObjectmail $mail -activeDirectoryCredential $cred -globalCatalogServer $globalCatalogServer -calculateEntraDN:$FALSE

Option 3C: Remove object by Active Directory ObjectGUID

#The following instructions locate the object by Active Directory objectGUID

$cred = get-credential #Provide credential of person with rights to read attributes from active directory

$globalCatalogServer = "DC.domain.com" #FQDN of a global catalog server

$objectGUID = "ef27bb06-70d6-4904-b8b5-2531ea3b5e5c"

reset-EntraConnectObject.ps1 -logFolderPath c:\temp -ADObjectGUID $objectGUID -activeDirectoryCredential $cred -globalCatalogServer $globalCatalogServer -calculateEntraDN:$FALSE

Option 4

This option is utilized when you only want to purge information from the Entra ID connector space. Generally, this is reserved for specific scenarios under the guidance of support. The Entra ID distinguished name is determined by locating the object in the connector space and copying the distinguished name value. Note that this option triggers a delta synchronization when the process is complete.

$dn = "CN={4272736E37395A7742456D3474535578366A746558413D3D}"
reset-EntraConnectObject.ps1 -logFolderPath c:\temp -EntraDN $dn

Option 5

This option is utilized when more than one Active Directory connector space is present. If the script detects the presence of more than on Active Directory connector space an error is returned. The connector space name must be specified when running the command to ensure that the desired object is deleted. Depending on the scenario it may be necessary to not perform the single item sync until an object is deleted from all connector spaces.

In this example the user exists in the Active Directory home.domain.com and domain.local. (This is typical for example in a resource forest scenario). To complete purge this object the object must be purged from three connector spaces. The distinguished names were obtained through a metaverse search.

The first command purges the object from one Active Directory connector space and the Entra ID connector space. Note that single object sync is not performed as the object still exists in the second Active Directory connector space.

The second command purges the object from the second Active Directory connector space. At the conclusion of this command the full object sync should be allowed to run (which is the default).

I recommend running these as a single code block to eliminate the possibility that a sync cycle could occur inbetween.

#Establish the DN for the first forest.
$adDN = "CN=Tim McMichael,OU=Users,OU=Objects,DC=home,DC=domain,DC=com"

#Establish the DN for the second forest.
$otherADDN = "CN=Tim McMichael,OU=Users,OU=Objects,DC=domain,DC=local"

#Establish the EntraDN from the metaverse search.
$entraDN = "CN={4272736E37395A7742456D3474535578366A746558413D3D}"

#Provide the connector name for the first forest.
$adConnectorName = "domain.com"

#Provide the connector name for the second forest.
$otherADConnectorName = "domain.local"

#Remove the object from the entra connector space
reset-EntraConnectObject.ps1 -logFolderPath c:\temp -entraDN $entraDN

#Remove the object from the first active directory forest.
reset-EntraConnectObject.ps1 -logFolderPath c:\temp -ADObjectDN $adDN -skipSingleItemSync:$TRUE -ADConnectorName $adConnectorName -calculateEntraDN:$FALSE

#Remove the object from the second active directory forest and perform a single object sync.
reset-EntraConnectObject.ps1 -logFolderPath c:\temp -ADObjectDN $otherADDN -CalculateEntraDN:$FALSE -ADConnectorName $otherADConnectorName

Other information…

For each operation run a folder is created in the log path directory specified. The folder is a file date time stamp. Inside this folder is the operation log file and XML file extractions of all objects discovered during the connector space deletions. If a full single item sync was executed a JSONsummary file of the sync operation is also included in this directory.

I hope this script allows administrators to purge objects from connector spaces for troubleshooting or issue resolution easily.