In EntraID Connect group write back may be enabled for your organization. Group writeback allows administrators to create Active Directory entries for cloud only group objects. Group writeback comes in two versions. For the purposes of this post group write V2 is enabled and only a subset of groups is enabled for synchronization.
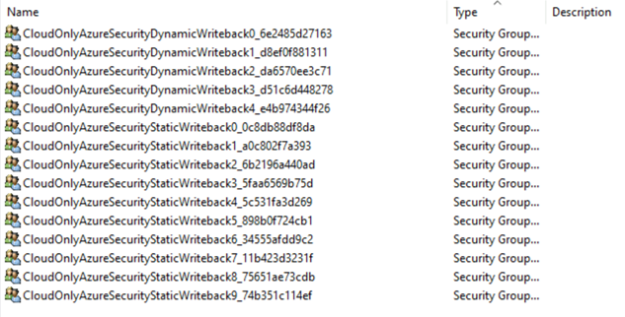
When group write back is enabled groups are written to Active Directory in the format Group_GroupObjectID. This format is not necessarily intuitive to matching the Active Directory object to the EntraID object.
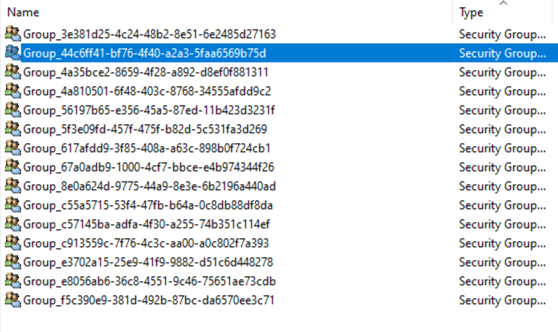
PS C:\Users\timmcmic> Get-MgGroup -GroupId 44c6ff41-bf76-4f40-a2a3-5faa6569b75d
DisplayName Id MailNickname Description GroupTypes
———– — ———— ———– ———-
CloudOnlyAzureSecurityStaticWriteback3 44c6ff41-bf76-4f40-a2a3-5faa6569b75d 731916f2-1 {}
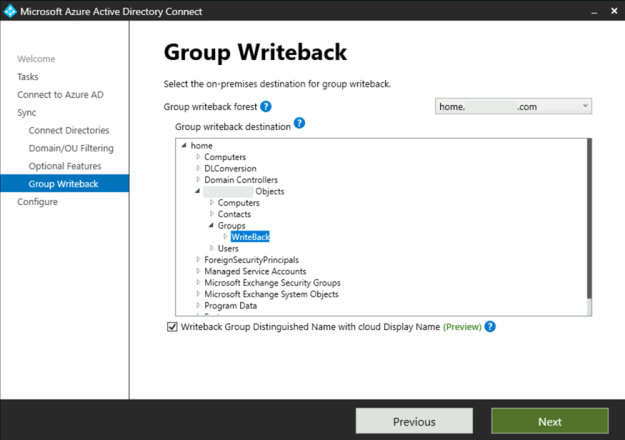
In EntraID Connect administrators now have the option to enable a preview feature “Writeback Group Distinguished Name with cloud Display Name). When enabled this feature will replace the Group_ with the cloud display name of the group. This allows for more intuitive management of groups written back from EntraID.
To enable the feature the Azure AD Connect setup wizard (commonly located on the desktop) is utilized. The checkbox to enable the feature is located on the Group Writeback configuration page.

In this case the feature is currently greyed out and cannot be enabled. This is due to Group Writeback already being enabled. The feature must be enabled at the time that group writeback is enabled. If you disable and re-enable group writeback this can result in any of the groups already written to Active Directory being removed. This could cause potential issues if those groups are nested or utilized to permission on-premises resources or utilized for mail flow. There is a way to perform this conversion without deleting and recreating the groups.
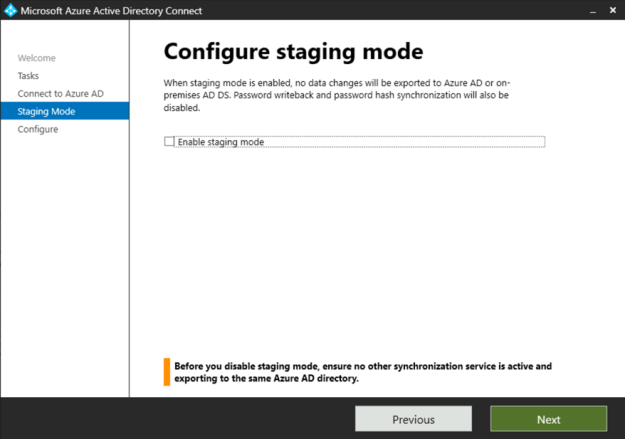
The first step in the process is to enable staging mode on the EntraID Connect Server. Enabling staging mode prevents any changes from being written to either Active Directory for EntraID until have had an opportunity to review the changes. When staging mode is enabled in this step we will also be disabling the synchronization cycle. This will prevent any synchronization operations from occurring while we are in the process of conversion. To enable staging mode:
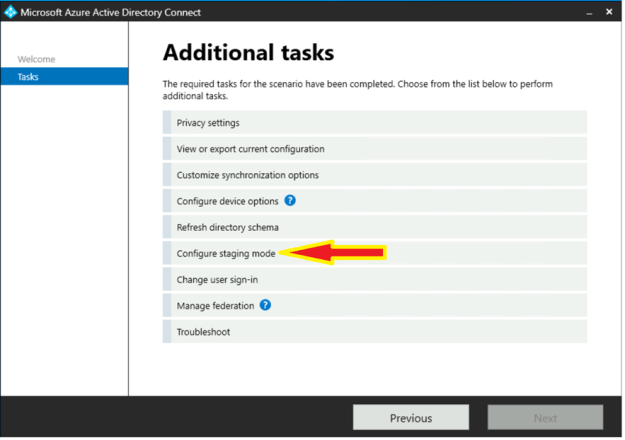
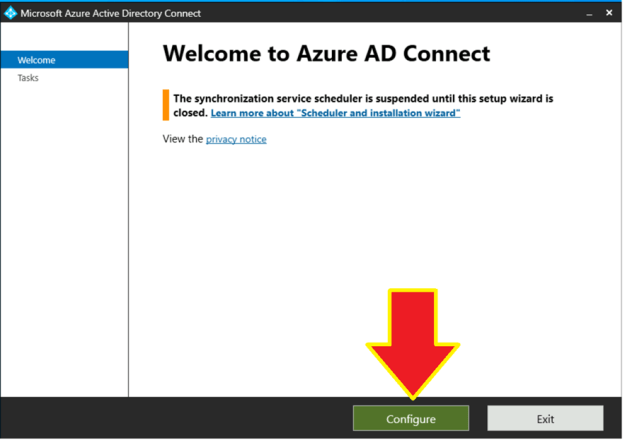
Run the EntraID Connect setup wizard on the desktop of the synchronization server and select configure.

In the configuration options screen select “configure staging mode”.
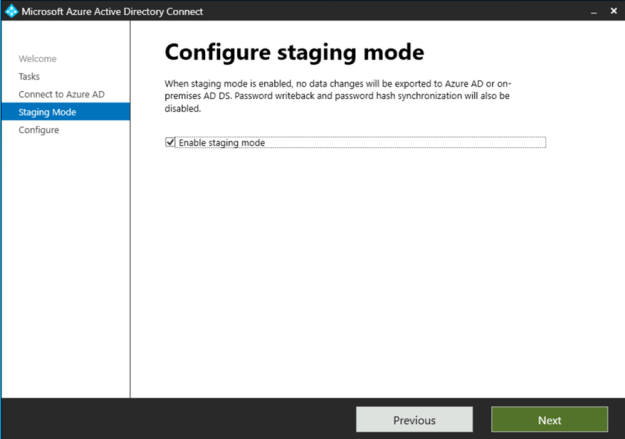
Follow the in screen prompts to perform authentication. When authentication is complete select “enable staging mode” on the appropriate screen.
Continue through the wizard until you reach the final step. Prior to click the configure button un-select “start the synchronization process when configure completes”.
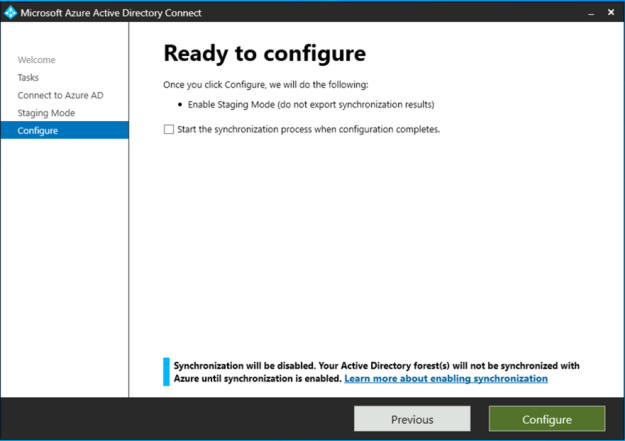
At the conclusion of these steps the server has now been placed in staging mode and the synchronization process has been suspended.
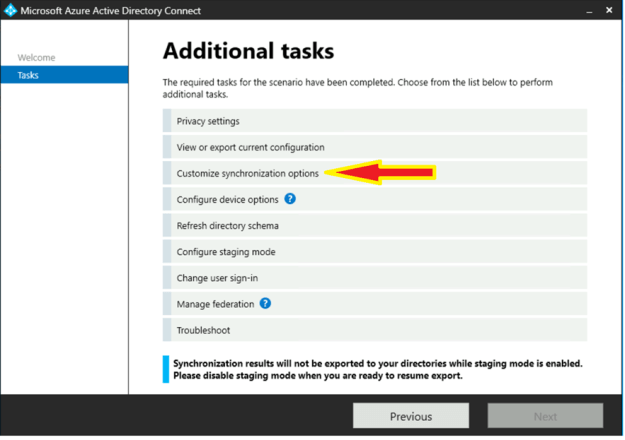
At this time group write can be disabled. With the machine in staging mode and the synchronization cycle suspended groups will not be removed from Active Directory. To disable group writeback run the EntraID Connect setup wizard on the desktop of the synchronization server and select configure.

Select the option to “customize synchronization options”.
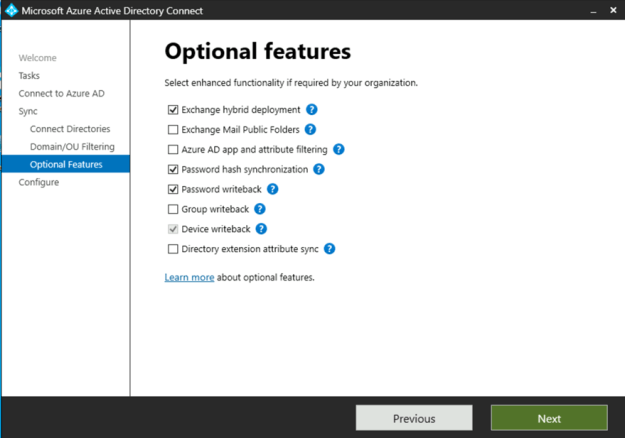
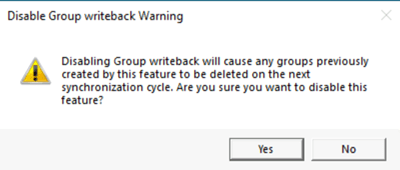
Proceed through the configuration wizard until the optional features page is displayed. On the optional features page de-select Group Writeback. There will be a warning presented indicating that groups already written to Active Directory will be deleted. This will not occur with the machine in staging mode and the synchronization cycle disabled.
Complete the wizard making no further changes. Currently group writeback is disabled, the synchronization cycle remains disabled, and staging mode remains disabled.
At this time group writeback may be re-enabled. To enable group writeback run the EntraID Connect setup wizard on the desktop of the synchronization server and select configure.
Select the option to “customize synchronization options”.

Proceed through the configuration wizard until the optional features page is displayed. On the optional features page select Group Writeback.

Select next to proceed to the group writeback configuration page. On the configuration page select the same organizational unit that the groups were previously written back to. (This is VERY important – the organizational unit must remain the same). Enable the feature “Writeback Group Distinguished Name with cloud Display Name” to utilize friendly names on the existing groups.
Continue through the wizard. On the group writeback permissions page you may select the option to configure with Powershell. The permissions are already configured from being previously enabled. Prior to selecting the configure button and completing the wizard ensure the checkbox to start the synchronization cycle is checked.
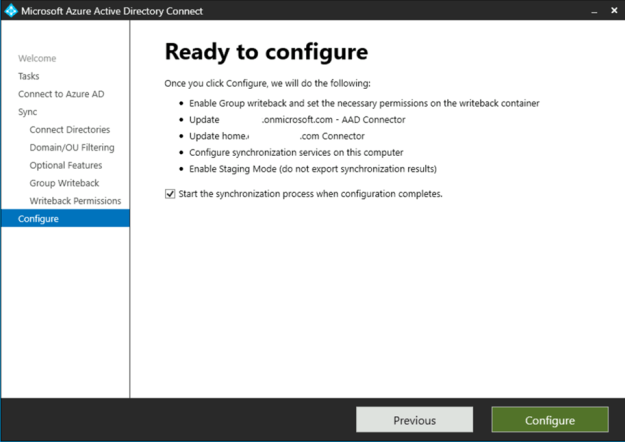
When the wizard has completed a synchronization cycle will begin. Please note that this change will cause a full import operation from Entra ID and a full synchronization operation to occur both in Active Directory and Entra ID. Depending on the size of the environment this could take several hours so please plan accordingly.
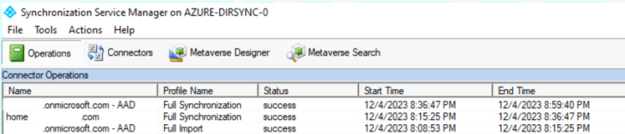
At this time we can validate the success of the change prior to taking the machine out of staging mode. To do so using the synchronization manager on the EntraID Connect server select the connectors button. Right click on the Active Directory Domain Services connector and select “search connector space”.

In the search connector space dialog, under the scope drop down, select pending exports. This will enable three options. Select the modify option and select search. This dialog will show all operations that are pending export had the machine not been in staging mode. We should see an entry for each group that was previously written back.
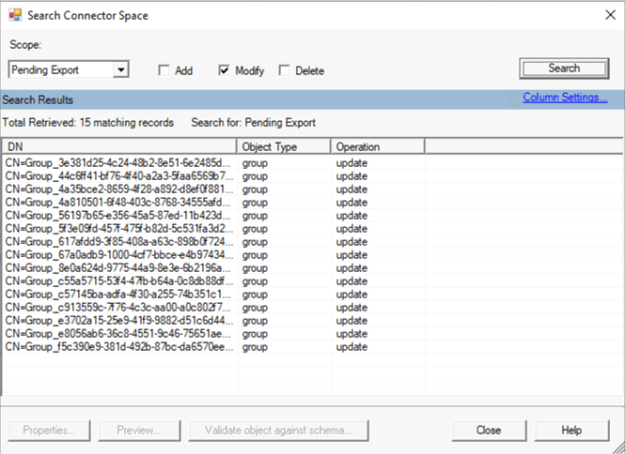
To validate a specific change double click on any of the groups displayed in the search. In the attribute dialog select the preview button. This will enable the attribute preview window. Select the generate preview button. This generates a preview of all calculated attributes. In the left hand pane, under connector updates, expand the connector for Active Directory and select export attribute flow.
Locate the entry where the data source is EscapeDNComponent. The initial value field will be NULL and the final value will display a CN value containing the name of the group. The presence of the name demonstrates that the change was successful.

The final operation is to remove the server from staging mode.
When staging mode is disabled the next delta synchronization cycle will result in the exports writing the updates to Active Directory.
If your environment is configured with both an active server exporting to EntraID and a staging server already you may consider making these changes on the staging server first. This allows the full import and synchronization operations to run without impacting the primary sync server. When the staging server has successfully completed these operations the server roles may be swapped. The process can then be repeated on the new staging server.
