For as long as I can remember the domains tab in the Microsoft 365 Administration Center for GCC-High tenants was intentionally hidden. I have previously written this article highlighting this and explaining the background -> Microsoft 365 GCC High Tenants and Missing Domains | TIMMCMIC.
Now that the domains tab is present administrators have access to the proper and accurate DNS records associated with the domains successfully verified in the tenant. One thing that Microsoft 365 administrators are noting is that the DNS records recommended do not match the previous documentation published here -> Domain Name System (DNS) records for Office 365 Government Community Cloud (GCC) High – Microsoft 365 Enterprise | Microsoft Learn. Administrators are noting differences in the MX records and enterprise enrollment cnames.
In our prior guidance administrators had to calculate the MX record manually for GCC High adoption. This process was simplified to take the onmicrosoft.us domain name prefix and append it to the known suffix for Exchange Online. This same MX record would then be utilized for all domains registered in the GCC High tenant. With the presence of the domains tab the MX records are now calculated in the same fashion as commercial tenants. This format follows domain-com.mail.protection.office365.us. For existing tenants, it is not a requirement to update or change the MX records as this time. For new tenants, I would recommend following the format displayed in the Microsoft 365 Admin Center.
Our prior guidance for DNS records also did not address enterprise enrollment and automatic Intune discovery. Administrators would have had to refer to separate documentation for the correct CNAME records for enterprise enrollment. This CNAME record is now included automatically in the domains tab – dns records display.
Microsoft provides a variety of consumer services that are accessed through a “Microsoft Account”. It is possible for a Microsoft 365 customer to have utilized their email address to sign up for Microsoft consumer services.
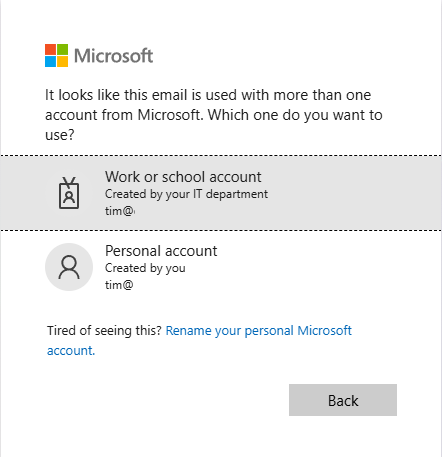
When a user has both a Microsoft 365 Identity and a Microsoft consumer identity, they are prompted to select a work or school account or personal account when signing into Microsoft services.
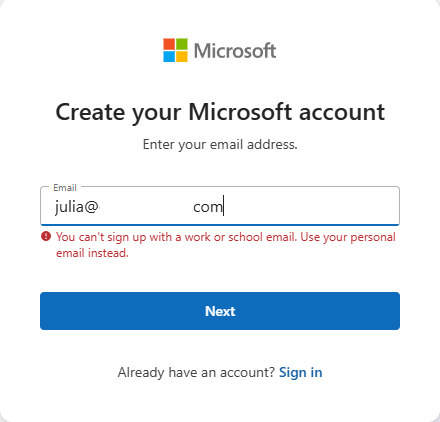
Creating a consumer or personal account using a domain that is registered in Microsoft 365 is now blocked and has been for several years. In many cases if a Microsoft 365 customer has both a personal and work or school account, they set it up prior to when this block was put in place. Here is a sample error that someone receives today when trying to utilize a domain registered in Microsoft 365 to establish a consumer account:
Microsoft does not provide the ability for administrators to compel a user to change the identity of a consumer account. We do provide guidance for users that want to change their personal account identity to either stop being prompted to select an account or to simply disconnect the relationship between the two identities. Change the email address or phone number for your Microsoft account – Microsoft Support
In general, users that have both a personal and Microsoft 365 account do not have issues utilizing both services with the same address. I have seen some issues though that cause concern, such as users receiving unusual sign in activity notices in their corporate mailboxes when the activity is actually related to their consumer identity. Microsoft account unusual sign-in activity | TIMMCMIC
I have worked on several escalations recently where customers have asked to quantify the number of consumer accounts that are related to Microsoft 365 identities. The goal of the project is to proactively reach out to these users and provide them guidance on how to follow the account rename process.
To provide administrators with an option to audit their consumer accounts I have published AuditConsumerAccounts to the PowerShell Gallery. Audit consumer accounts is a PowerShell module that allows administrators to gather all identities and addresses from EntraID and perform an audit against Microsoft consumer account information. At the conclusion of the audit a report is generated that lists any consumer accounts discovered as well as any accounts that an error was encountered.
AuditConsumerAccounts supports a variety of graph authentication methods. If the account list to be audited is greater than 50 members it is recommended to utilize a graph connection method that relies on an app registration within the tenant. This allows the module to batch users into smaller groups for testing rather than iterate through users sequentially.
Administrators also have the flexibility to define the scope of addresses they would like to test for consumer identities. By default, the objects user principal name is always included for testing. The module also supports the ability to add just primary SMTP addresses for testing or add all user proxy addresses for testing. In most environments the user principal name and primary smtp address are the same resulting in only a single address being verified. The module also supports testing only for a specific domain across the address set based on a list of domains provided at runtime. Note: The domains must be registered as domains within the tenant to utilize this feature.
AuditConsumerAccounts tests the entire organization by default. The command also supports providing a graph filter to scope a query of objects against EntraID or allows administrators to specify a list of user identities to specifically test. This is helpful if you are only interested in auditing a subset of your users.
To start using AuditConsumerAccounts run PowerShell 7.6.1 as administrator and run the following command:
Install-Module AuditConsumerAccounts
When the module has been successfully installed the start-AuditConsumerAccounts command is utilized to begin the audit process. Here are some examples:
Start an audit of all accounts and all proxy addresses using graph interactive authentication.
$logFolderPath = "c:\temp"
$tenantID = "EntraTenantID" #This is your Entra Tenant ID
Start an audit of all accounts and only primary proxy addresses using graph client secret authentication. This is just one example, -testPrimarySMTPOnly:$TRUE can be added to any command using any authentication type.
$logFolderPath = "c:\temp"
$tenantID = "EntraTenantID" #This is your Entra Tenant ID
$appID = "App registration ID"
$clientSecret = "Client secret assigned to app registration"
Start an audit of select accounts using a graph filter and using graph client secret authentication. This is just one example, -msGraphRecipientFilter can be added to any command using any authentication type.
$logFolderPath = "c:\temp"
$tenantID = "EntraTenantID" #This is your Entra Tenant ID
$appID = "App registration ID"
$clientSecret = "Client secret assigned to app registration"
Start an audit of select accounts by providing an array of user identities in the format of Azure Object IDs or User Principal Names. -bringYourOwnAddresses can be utilized with any graph authentication type and will test all addresses on the user by default unless -testPrimarySMTPOnly:$TRUE is also specified. This example uses graph client secret authentication.
#Define an array of addresses
$addressesToTest=@()
#Add users to the array to test either manually or through some other export / import.
$addressesToTest += "user1@domain.com"
$addressesToTest += "user2@domain.com"
$addressesToTest += "user3@domain.com"
$logFolderPath = "c:\temp"
$tenantID = "EntraTenantID" #This is your Entra Tenant ID
$appID = "App registration ID"
$clientSecret = "Client secret assigned to app registration"
Start an audit of select domains by providing an array of domains. -bringYourOwnDomains can be utilized with any graph authentication type and will test all addresses that match the domain by default unlesss -testPrimarySMTPOnly:$TRUE is also specified.
#Define an array of domains.
$domainsToTest = @()
#Add domains to the array to test.
#These domains must be registered in the tenant that you are authenticating to.
$domainsToTest += "domain.com"
$domainsToTest += "domain2.com"
$logFolderPath = "c:\temp"
$tenantID = "EntraTenantID" #This is your Entra Tenant ID
$appID = "App registration ID"
$clientSecret = "Client secret assigned to app registration"
When the command is executed a graph connection using the specified authentication type is automatically performed. The scopes specified in the execution are verified as present after the connection has successfully been made. If the connection is unsuccessful or the scopes are not present the command will fail.
Once the graph connection is established, a call is made to extract all domain information from the tenant. If a custom domains list is provided, the list is validated to ensure the domains are registered in the tenant.
When the domains have been validated, the next step is to pull the users from EntraID. By default, all users are pulled unless a filter is specified or a list of addresses is specified. Guest accounts are automatically excluded from testing.
When the list of users has been gathered the command starts creating objects representing address combinations to test. As indicated user principal names are always included for testing as well as all proxy addresses on the user unless -testPrimarySMTPOnly:$TRUE is specified. The script automatically removes any addresses on a user that are not at domains registered in Microsoft 365. At the conclusion of list generation, the list is filtered to remove duplicates from being tested.
At this time further testing depends on the graph authentication type and number of objects to test. If the authentication type is not interactive and the number of users to test is greater than 50, the list of addresses is broken up into groups of 50. The script will then recursively create jobs to test users in batches of 50, with 5 concurrent jobs running at any one time. Each job sleeps for 1 second after each user validation with the entire job sleeping randomly between 5 – 10 minutes at the conclusion of testing 50 users. This is required to avoid service side throttling when attempting bulk user evaluation. A new job is created as jobs finish until all jobs representing all of the users have completed. If interactive authentication is utilized or the user count is less than 50 the list of users is iterated through sequentially until all testing has completed.
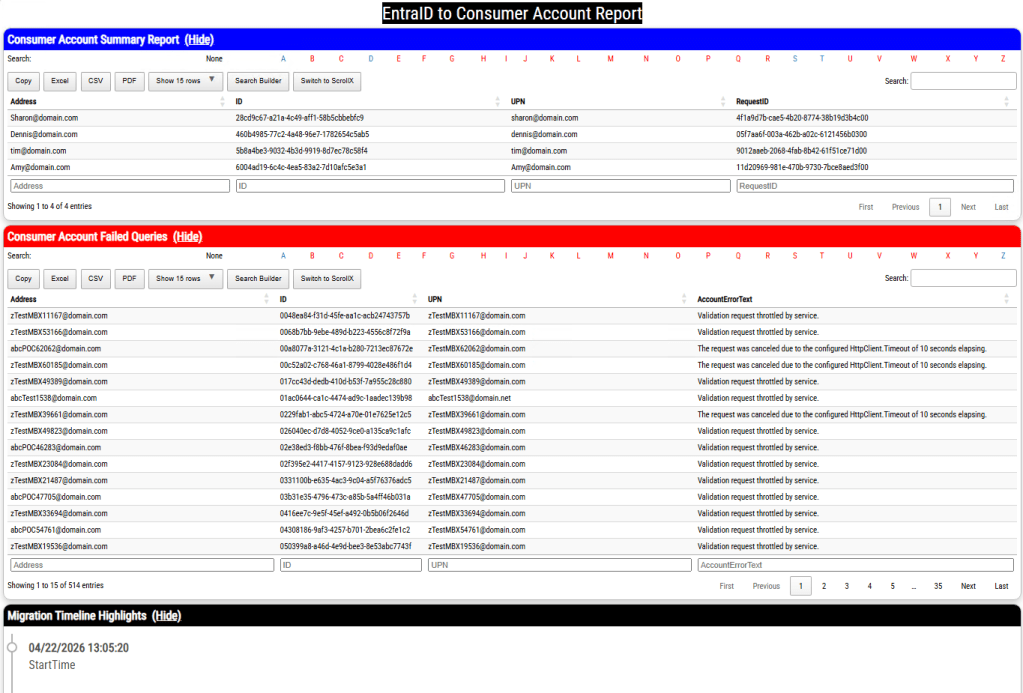
When the command finishes auditing all details of the audit are exported to an XML file located in the log file directory. An HTML report is also created and displayed to the administrator. The report contains three sections. The first section is the list of consumer accounts identified, the second section is a list of account test errors, and the last section is the timeline of testing.
It is expected to have a list of accounts that fail to audit either due to HTTP call timeouts or an audit backoff from the service. The command exports all failed accounts to a separate file that allows administrators to retry the reporting operations on these accounts. Here is an example using graph client secret authentication:
#Import the list of failed accounts from the first run.
The auditing process can take a long time to complete, and this is expected. In testing to complete 140,000 address tests took 3 days 6 hours to complete. The list of throttled or failed HTTP calls averaged 500 in these repeated tests.
With the auditing process complete administrators may now understand the scope of commercial accounts present and if they desire to do so develop a targeted communications campaign to assist these users in updating their identities to no longer have a relationship to registered addresses in Microsoft 365.
Microsoft Graph supports multiple methods to authenticate to EntraID to perform graph functions. One method of connecting is to utilize client secret authentication. This process is a little different than interactive authentication or certificate authentication.
The client secret authentication process begins with creating an app registration in Entra ID. To create the app registration:
In the name field I recommend something intuitive – for example MicrosoftGraphClientSecretAuth
Do not change any other fields.
Select the register button to complete creating the app registration.
When the application registration has been completed successfully you are automatically taken to the app registration. At this time copy the Application (Client) ID as this will be required for further operations.
To enable the application registration to perform work API permissions for Microsoft Graph must be added. To add api permissions:
Under Manage -> API Permissions
Select the add permission button.
Select Microsoft Graph
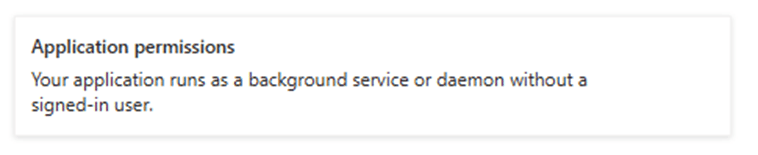
Select Application Permissions for the application permission type
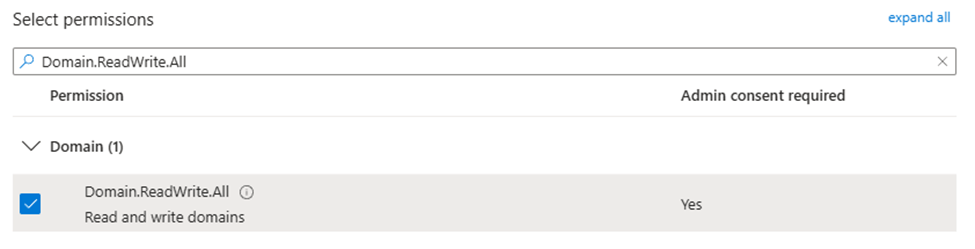
In the search box type the permission that you are looking for.
For example, if modifying a domain type Domain.ReadWrite.All
In the permissions list this searches for all relevant permissions.
In this example you would expand domains and select Domain.ReadWrite.All
Select the add permission button when all of the permissions have been added that are required for your graph work.
When permissions have been added to an app registration, they do not become active until someone with permissions to grant consent provides consent. On the API permissions page is an option “Grant Consent for TenantName”. It is important that after assigning API permissions this option is selected to grant consent and active the permissions.
The final step in the process is to create the client secret. To create the client secret:
Select Manage -> Certificates & Secrets
Select New client secret
In the description I recommend something intuitive – for example – “MicrosoftGraphClientSecret”
Adjust the expiration to an acceptable time limit – I recommend the default of 180 days.
Select the Add button to complete the client secret.
The client secret is now displayed. There is a copy button to the right of the VALUE field. Select copy and save this value in another location. This will be your only opportunity to see the value of the secret created.
***WARNING*** Treat this value as you would any privileged account password. This value combined with the application ID will allow any administrator access to this application and all permissions assigned.
To connect to Microsoft Graph utilizing client secret authentication:
#Ensure that all graph modules are up to date.
#Note that this process can take an extended period of time depending on the number of graph modules installed
If the connection is successful, you are now using Microsoft Graph with client secret authentication and with the permissions granted to the app registration utilized.
This week I was working with a customer that converted a domain from federated authentication to managed authentication for the purposes of testing the transition. This is not an uncommon occurrence, as many customers that utilized federated authentication often combine it with Password Hash Synchronization to provide a measure of redundancy for authentication in the event that their federated authentication provider is no longer available.
At the time that I was engaged the customer was raising an escalation on how to convert the domain back to federated authentication. To convert the domain to managed authentication the customer utilized Update-MGDomain -domainID “Domain” -authenticationType “Managed”. This is an appropriate method to convert the domain from federated to managed authentication. The customer was attempting to use Update-MGDomain -domainID “Domain” -authenticationType “Federated” and received the following error
update-MGDomain -DomainId "domain.net" -AuthenticationType "Federated"

update-MGDomain : Changing authenticationType from Managed to Federated is currently not supported.
Status: 400 (BadRequest)
The documentation for Update-MGDomain does list “Federated” as an authentication type.
Technically this is correct, the command does evaluate and return an authentication type of Federated but cannot be utilized on its own to convert a domain from managed to federated authentication. Federating a domain requires information and attributes beyond what Update-MGDomain accepts.
This leads to a conversation regarding the “supported” method to federate a domain with Microsoft 365. Our response was to utilize Entra Connect and the integration with ADFS. There is not though a specific document that says this is the “supported” method. If there’s no documentation how do we come to conclusion this is the “supported” method.
Prior to the integration of ADFS with Entra Connect customers had access to a command convert-MSOLDomainToFederated. This command was designed to be run on ADFS and not only converted the domain to federation in EntraID by stamping the appropriate federation attributes but also created a generic federation trust within ADFS. In many cases the generic federation trust that was created did not reflect the same settings that customers utilized for synchronization, such as sourceAnchor, UPN, device registration etc. In the most simplest scenarios, it worked fine but more advanced scenarios it did not support.
The Convert-MSOLDomainToFederated has since been deprecated and has no equivalent graph replacement. This leaves Entra Connect an attractive alternative to federating a domain. Using Entra Connect has several benefits over other options. When using Entra Connect the ADFS farm is registered with the installation. As changes to configurations occur Entra Connect will automatically update the properties of the federation trust. It automates the addition of ADFS and WAP servers to existing farms and supports full certificate management capabilities. One of the drawbacks is that converting a domain to federated from managed authentication is a per domain process. It works well for single domains but not necessarily for 100s of domains.
Microsoft Graph supports the ability to convert a domain to federated authentication through the new-MGDomainFederationConfiguration command.
As long as the administrator is aware of the appropriate values this command can be utilized to convert the domain. This also assumes that the federation trust that exists in ADFS has been created in a manner that fully supports Microsoft 365.
What is the recommendation if we have to convert to managed authentication in an emergency?
If the ADFS environment, Active Directory, or network infrastructure becomes compromised many customers rely on the conversion to managed authentication to restore access to their cloud services. When password hash synchronization has been enabled this is an easy and quick transition. When the recovery actions have been completed, I recommend utilizing the Entra Connect installation to re-federate a minimum of two domains. This ensures that the federation settings within Microsoft 365 have accurate values and the federation trust in ADFS is created in a manner supporting Microsoft 365. For additional domains Microsoft graph can be utilized to pull the federation settings from the converted domains and other domains federated with New-MGDomainFederationConfiguration.
When attempting to prove ownership of a domain administrators sometimes encounter a scenario where the domain is associated with another tenant. It is possible that the domain is associated with an unmanaged (viral) tenant within Microsoft 365.
The external takeover method relies on Microsoft Graph to complete the process. Unfortunately, the instructions currently contained in our published guidance no longer work. In this post I want to provide updated guidance on how to utilize graph to perform the external takeover method.
In order to preform an external takeover the account or graph application that you are using must have the appropriate rights for domain management. Information on domain verify can the permissions supported may be found here: https://learn.microsoft.com/en-us/graph/api/domain-verify?view=graph-rest-1.0&tabs=http. In this instance Domain.ReadWrite.All are the only permissions supported. Please note that consent may be required in order to add these permissions.
Prior to performing the external admin takeover, the domain will need to be added to the tenant and the appropriate DNS records for validation in place.
To perform the process of the external takeover we will:
Connect to Microsoft Graph and specify the minimum permissions required.
Create a URL to call domain verify.
Create body parameters to include with the domain verify post that force takeover is specified.
EntraID provides methods for administrators to enable end users to manage and reset their passwords utilizing Microsoft cloud services. This feature is known as Self Service Password Reset.
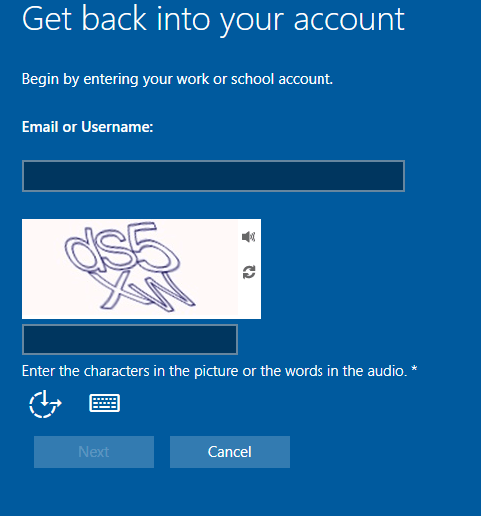
The password reset process starts by requesting the user provide their sign on name and complete a character validation.
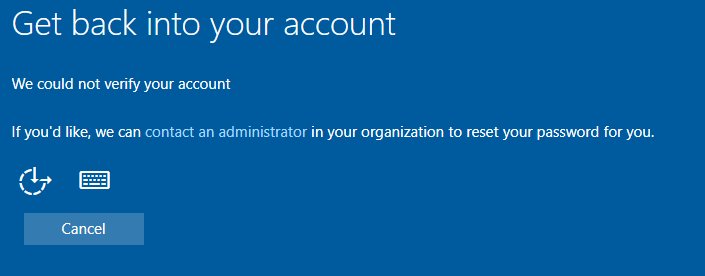
When the form is completed the next button allows the user to proceed with the process. If the account is valid, enabled for self-service password reset, and meets the authentication methods requirements for the feature the process will continue. If for some reason the users account information cannot be validated, for example they are not enabled for self-service password reset or the user has not proofed up authentication methods that would allow for self-service password reset, the following screen is displayed.
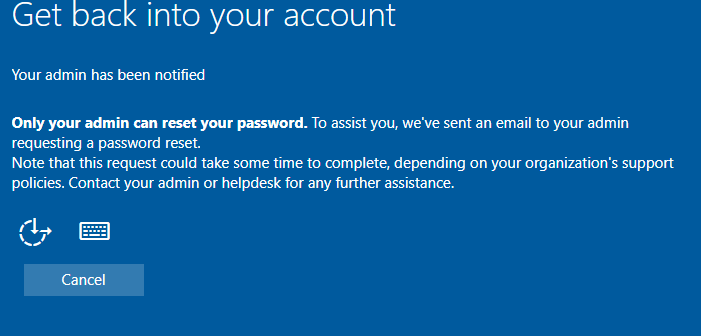
In this dialog the user has the option to “contact an administrator”. When this option is selected the process concludes with the following dialog.
When this option is selected, an email is generated to administrators of the tenant informing them of the request to reset the password. On the surface this email looks highly suspicous.
When the email is received by administrators there are often questions regarding the validity and authenticity. Here are some methods to review the email for ligitimacy.
Review the message header for basic antispam evaluation. For example, errors in the SPF record evaluation or DKIM signing of the message.
spf=pass (sender IP is 40.93.12.1) smtp.mailfrom=microsoftonline.com; dkim=pass (signature was verified) header.d=microsoftonline.com;dmarc=pass action=none header.from=microsoftonline.com;compauth=pass reason=100
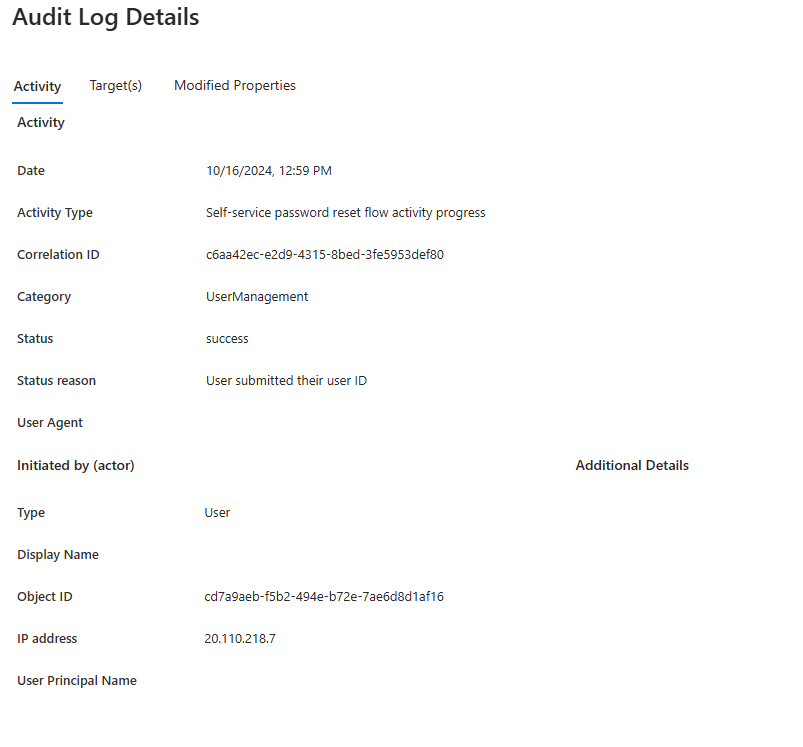
The EntraID audit logs for the user account may also shed light into the validity of this email. When a user enters the password reset process, if the username is valid, entries are generated in the EntraID audit log.
This entry provides information that the user entered the flow and provided a user name.
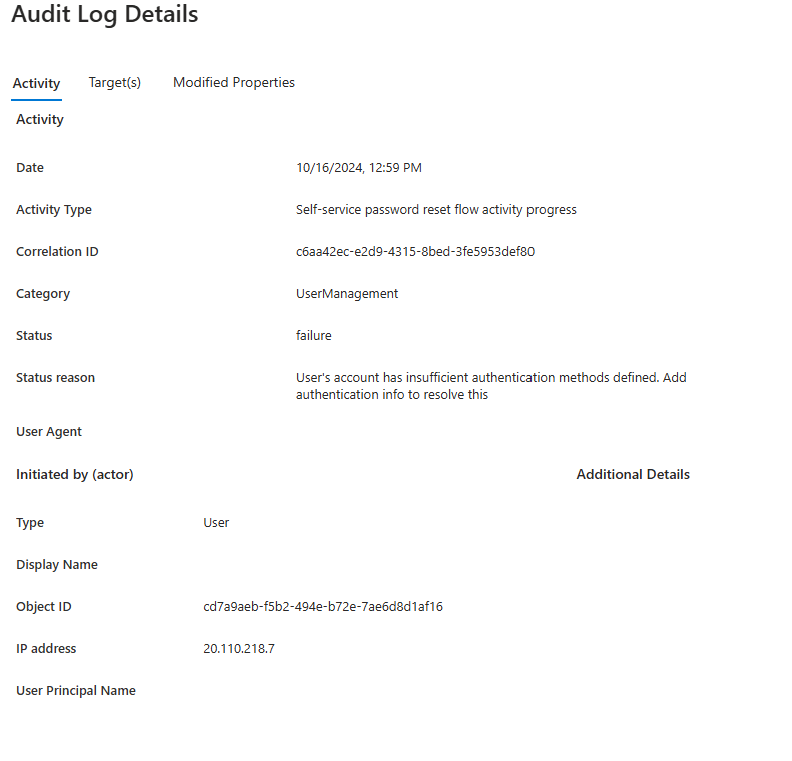
The next event in the audit log shows the source of the contact administrator dialog. In this case the user account had insufficient authentication methods to allow the user to perform their own reset. There could be other failure categories here that lead to the contact administrator dialog – this is just one.
User’s account has insufficient authentication methods defined. Add authentication info to resolve this
User Agent
Type
User
Display Name
Object ID
cd7a9aeb-f5b2-494e-b72e-7ae6d8d1af16
IP address
20.110.218.7
User Principal Name
UPN
The audit log information should be helpful in determining not only if the email received is legitimate but also if the end user themselves triggered the password reset workflow.
If the information in the audit log and the message header checks out the legitimacy of the message maybe verified.
==================
Entire email contents below for parsing.
==================
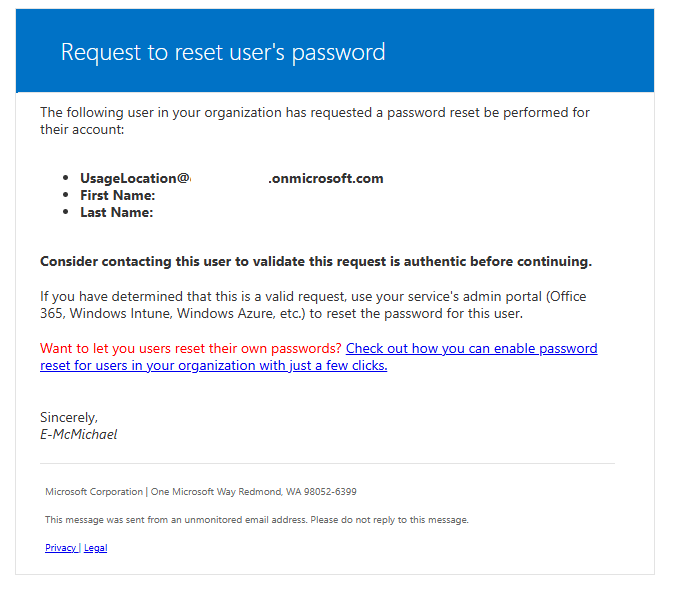
Request to reset user’s password
The following user in your organization has requested a password reset be performed for their account:
UsageLocation@domain.onmicrosoft.com
First Name:
Last Name:
Consider contacting this user to validate this request is authentic before continuing.
If you have determined that this is a valid request, use your service’s admin portal (Office 365, Windows Intune, Windows Azure, etc.) to reset the password for this user.